Friday, April 29, 2011

Dairy-Free Chip Cookies and The Beginning of a New Adventure…

IMG_2468

Dairy Free? Can in really be done? I mean… can it REALLY be done with someone like me? A month or two ago, I would have told you ABSOLUTELY NOT, but I have found a few gems a long the way that have really helped out. Rice Milk is one of them!

Alternative milks I like (in this order):

  • Flax Milk is my favorite, but it is newer and hard to find. It tastes really good- vanilla flavored… Mmmmm! And it has that Omega 3 that is really good for you. They enrich these milks, so they have just as much calcium as a glass of cow’s milk- which I think is pretty cool.
  • I also really like Rice Milk- the flavor isn’t too strong, but it does taste like rice. My husband didn’t like any of them until he tasted this, but he love rice, so there you have it.
  • I also like Coconut Milk- it was so good in cereal!

However, I’m not as big a fan of Almond or Soy Milk- which are much easier to find. I just didn’t care for the flavor as much, but that is just my two bits on the subject. Why Dairy Free?, you may be asking. My husband and daughter have had a couple health issues, and we’ve found out they might have a food allergy/irritation to dairy, so I’ve just been trying to cook most of our meals without. I have been surprised at the difference- we have all felt better. My husbands stomach pains have decreased and my daughters issues are almost gone! It is hard, I still haven’t completely gotten rid of the cheese and yogurt- those have been the hardest, but we’ve found that the low fat kinds seem to cause the worst reactions.

ANYWAY- enough about all that- I did try out these cookies I found on the side of the Rice Dream carton. They were pretty good. I like the maple syrup flavor in them—although I don’t know how “healthy” that was with all the high fructose corn syrup… oh well, I guess you win some and you loose some. :) It reminds me a little bit of the guy I saw using one of those aluminum water containers to “help the environment” and I watched him open a plastic water bottle, pour it in, and toss it…Hmmmm…I guess you just do the best you can and just hope to yourself you are making a difference. Maybe you just feel a little less guilty anyway. :)

Huey's Chip Cookies (Rice Dream)

Makes 12 large cookies or 3 dozen small cookies

  • 1 cup whole wheat flour
  • 3/4 cup maple syrup
  • 1 cup unbleached white flour
  • 1 tsp. vanilla
  • 3/4 cup carob or chocolate chips (I used mini dark chocolate chips.)
  • 1/2 cup Rice Dream Classic Original or Vanilla
  • 1/2 cup canola oil
  • 1 Tbs. baking powder
  • 1/2 cup chopped walnuts or pecans

Preheat oven to 350. Mix all ingredients in a large bowl. Drop by scoop or spoon onto a lightly oiled cookie sheet. Bake 10 - 20 minutes (depending on size) until edges begin to brown.

Tuesday, April 26, 2011

Blueberry Muffins with Crumble Topping

IMG_2435

Yes… you are absolutely right, I will admit that I make a lot of muffins. I can’t help it. I just REALLY like muffins. They always sound good and almost always taste good… especially blueberry muffins… ESPECIALLY THESE BLUEBERRY MUFFINS! Mmmmm. So good. I promise! I have made so many different recipes for blueberry muffins—Emily’s To Die for Blueberry Muffins (from whence came the crumble topping for these, and which I embarrassingly posted twice, I just found out), The Best Blueberry Muffins I Ever Made, Sour Cream Blueberry Bread, Bacon Blueberry Scones, and Good Morning Blueberry Bran Muffins. Can you tell I really like blueberries—and really super-duper like blueberry muffins? :) The first two recipes are my favorites, but I think this one takes the cake…or the muffin in this case, or at least ties with the other two, especially with the addition of crumble topping. A wondrous way to start the day!

Blueberry Muffins (Susanna Tee, 1 Mix, 100 Muffins)

  • 2 cups all-purpose flour (I did half wheat, half white- seems to be a good balance, a little more substance, but not too heavy.)
  • 1 T baking powder
  • 1/8 tsp salt
  • heaping 1/2 cup firmly packed brown sugar
  • scant 1 1/2 cups frozen blueberries
  • 2 eggs
  • 1 cup milk
  • 6 T oil
  • 1 tsp vanilla
  • zest of 1 lemon (I cannot emphasize enough what a difference this little secret weapon makes! Totally transforms a typical blueberry muffin- don’t leave it out, and if you don’t have lemon, use orange, maybe even lime… it just needs that citrus kick.)

Preheat oven to 400 and grease or line 12 muffin cups. Sift together flour, baking powder, and salt into a large bowl. Stir in the sugar and blueberries.

Lightly beat the eggs in separate bowl, then beat in the milk, oil, vanilla, and lemon zest. Make a well in the center of the dry ingredients and pour the beaten liquid ingredients. Stir gently until just combined- do not over mix.

Spoon the batter into muffin cups. (Sprinkle on your crumble topping now before baking, if you are adding that.) Bake at 400 for 20 minutes, until well risen, golden brown, and firm to the touch.

Let the muffins cool in the pan for 5 minutes, then serve warm or transfer to a wire rack and let cool completely.

Crumble Topping: (Pretty easy to mix together, and worth the extra 5 minutes!)

Mix together 1/2 cup sugar, 1/3 cup flour, 1/4 cup butter, and 1-1/2 teaspoons cinnamon. Mix with fork, and sprinkle over muffins before baking.

Thursday, April 21, 2011

Lion House Porcupine Meatballs

IMG_2385

I just haven’t had quite the same motivation in the kitchen with this baby taking away some of my appetite and desire to cook (not to mention the heartburn :), so it is a good thing I have sweet friends with good recipes! I mentioned my dilemma to my friend Jackie, and she e-mailed me this yummy recipe. She was saying she likes this one because after you prepare, you just let it simmer for an hour and you don’t have to worry about it so much. I tired it out and really liked it. I have to admit I was nervous that it might just taste like tomato soup, but was surprised at the yummy unique flavor. My husband did the stirring because I had to leave for a bit, and not that I’m complaining, but they didn’t quite look as much like meatballs afterwards :) but they still tasted great and they weren’t burned, so thanks hubby. And thanks Jackie for motivating me to get dinner on the table. :) Keep ‘em comin’ friends!

Lion House Porcupine Meatballs
1 lb. lean ground beef
1/3 c uncooked rice
1/4 c chopped onion
1/4 c water
1 tsp salt
dash of pepper
1 can tomato soup (condensed)
1/2 tsp chili powder
1/2 c water


*Combing beef, rice, onion, 1/4 cup water, salt, and pepper. Shape into one inch balls. Set aside. Blend soup and chili powder. Stir in 1/2 cup water. Bring to a boil. Add meatballs. Cover and simmer gently for one hour. Stir occasionally. Makes about 6 servings.

Monday, April 18, 2011

Quick and Easy Cupcakes with Lemon Frosting PLUS a Self-Rising Flour Recipe

IMG_2320

IMG_2321

IMG_2319

I’m coming out of “birthday central” at our house. We have three right in a row (soon to be almost four, because I’m due with another little one in a month), and my daughter was the only one who actually ended up with a “cake”. I made little girly cupcakes for her party. She requested “Pink Lola Frosting” (Charlie and Lola is one of our all-time favorites, so here is a link to a cute Charlie and Lola birthday episode that I highly recommend watching—I dare say I enjoy them just as much, if not more then my kiddos… just a little confession. :) I got this great Mom and Me Cookbook a while back for kids. It is so cute and simple and kids have fun helping because it is so visual. I had to have something to put that “Pink Frosting” on, and this ended up being just as “Quick and Easy” as it boasts to be. :) Better than a cake mix and dare I say, just about as easy. I added just a bit of lemon juice to have it go with the Lemon Frosting I made. Ended up being a tasty little Spring-Time Birthday Cupcake! Wish you could have made it to the party. :)

Lyd’s Tip: It’s easy to make something look fancier with a slice of fruit. Just kind of dresses things up and makes it look special. I would recommend waiting until you are ready to serve though if you are doing a wet fruit like a strawberry- it got a little soggy and wet on the frosting. I also thought the sprinkles would be fun, but by the time I served them, they had bled onto the strawberry and it didn’t look quite so “pretty” but the kids didn’t seem to mind. :)

Quick and Easy Cupcakes (Annabel Karmel, Mom and Me Cookbook)

  • 2 eggs
  • 1 tsp vanilla
  • 2/3 cup superfine sugar
  • 1/2 cup soft butter
  • 1 cup self-rising flour (Don’t panic- it’s ok if you don’t have it, just scroll down and I’ve included an easy recipe for self-rising flour.)

Preheat oven to 350. Put all the ingredients in a bowl and beat together until the mixture is smooth and slightly lighter in color.

Line a muffin pan with muffin papers and half-fill each paper with the cupcake batter.

Bake the cakes. You can tell they are done when they have risen up, are golden in color, and spring back into shape when pressed.

Lemon Frosting

(I came across this recipe last summer when I made Lime cupcakes for my sister’s birthday and it is totally my favorite frosting recipe! (As you can see, I subbed Lime for Lemon this time.) It is the first time you actually REALLY want to eat the frosting right off the top- so yummy. Be warned though, it makes a huge batch- I made 24 cupcakes, and I still had almost half a bag left… which isn’t really a problem. :) I made a very creative, yummy fruit dip with it by adding a bit of cream cheese and yogurt, but I think it is best in frosting form.)

  • 3/4 - cup Butter, softened
  • 6 - cups powdered sugar
  • 1/8 - teaspoon salt
  • 1 - Tablespoon half and half or milk
  • 1 - teaspoon vanilla
  • 1 tablespoon freshly grated lime peel (I zested 2 times) (I used Lemon zest.)
  • 2 Tablespoons lime juice (the juice of 2 limes) (I used Lemon juice.)
  • 2 - Tablespoons light corn syrup
  • In a large bowl, beat 3/4 cup butter at medium speed until creamy.
  • Gradually add powdered sugar and 1/8 teaspoon salt alternately with half & half and 1 teaspoon vanilla, lime peel and juice, scraping bowl often, until well mixed.
  • Stir in corn syrup.
  • Frost cupcakes. (I scooped all my frosting into a zip-lock bag, got air out and sealed tightly. Then I cut about 1/4 inch off the end and piped icing out in a circle starting on the outside of the cupcake and moving into the center. I garnished with a strawberry slice.

    Self Rising Flour (about.com)

  • For each cup of all-purpose flour, add 1 1/2 teaspoons of baking powder and 1/2 teaspoon of salt.
  • Mix to combine.
  • Saturday, April 16, 2011

    Healthy Oat & Prune Muffins

    IMG_2170

    Hey- it’s Muffin Monday… or wait, Saturday. :) You won’t feel one bit of guilt eating these healthy muffins. They were surprisingly tasty too! The prunes are actually pretty good in them- they add some moisture. They mix up fast too, which is always nice. A healthy breakfast or snack!

    Healthy Oat & Prune Muffins (Susanna Tee, 1 Mix, 100 Muffins)

    • 1 cup of all purpose flour (I went ahead and did whole wheat, why not if we’re thinking healthy?)
    • 1 tablespoon baking powder
    • heaping 1/2 cup firmly packed light brown sugar
    • scant 2 cups rolled oats
    • heaping 3/4 cup pitted prunes chopped
    • 2 large eggs
    • 1 cup milk
    • 6 tablespoons butter
    • 1 teaspoon vanilla extract

    1. Preheat the oven to 400 F/200 C.

    2. Grease a 12-cup muffin pan or line with cases.

    3. Sift together the flour and the baking powder and then stir in the sugar, oats and prunes.

    4. Lightly beat the eggs in a bowl and then add the milk, oil, vanilla extract.

    5. Then add the wet ingredients to the dry ingredients.

    6. Stir gently until just combined, do not over mix.

    7. Spoon the batter into the prepared muffin pan and bake in the oven for 20 minutes until well risen, golden brown and firm to the touch.

    8. Allow the muffins to cool in the pan for 5 minutes and then remove to wire rack and allow to cool completely.

    IMG_2167

    Wednesday, April 13, 2011

    Homemade Tartar Sauce

    IMG_2356

    My hubby took me out for fish and chips on my birthday. It was so good! I was inspired by the yummy tartar sauce- that is most definitely an acquired taste for me. When I was little, I was not interested at all, but now I could just spoon it out and eat it alone. :) Anyway- we recently had some crab cakes, and I felt like they needed that yummy tartar sauce, so I did some hunting and found a pretty good recipe. I love small raw onions- also probably an acquired taste (I feel a little like a rough pirate-like character embracing such a strong, rugged veggie). I just love the crunch, and when they are finely chopped, I don’t think they are too strong or overpowering… and least, I like to think that, but my onion breath might suggest otherwise. :)

    Lyd’s Tip: I must say that “1 quart of mayo” is a lot. You’ll probably want to cut this one down. (What a great area to sub some plain yogurt- cheaper and better for you- I wouldn’t swap it straight across though.) I made a smaller batch, and I still had a lot left over. I was wondering what to do with it, but then I started thinking about how it might work well for tuna fish sandwiches. It was been awesome! A great flavor and you just add the tuna and a little bit of this sauce and you are good to go. These extra few ingredient kick it up a notch, and the kids really liked it.

    Tartar Sauce (allrecipes.com)

    • 1 quart mayonnaise
    • 1/4 cup lemon juice
    • 1 cup diced onion
    • 1 cup finely chopped dill pickle

    In a stainless steel or glass mixing bowl, combine the mayonnaise, lemon juice, onion, and dill pickle. Mix thoroughly. Transfer to a glass or plastic container with a tight lid and refrigerate.

    Sunday, April 10, 2011

    Asian Marinated Steak

    IMG_2007

    IMG_2006

    I wanted to make a nice Asian meal for Doug a while back… ok Valentine’s Day, I think it was—I know, I’m a little behind on some of my posts. :) Anyway, I ended up cooking up these yummy steaks- this recipe was for flank steaks, and I can’t remember what cut this was, but it wasn’t that. They still tasted good and I used my “George Forman” to grill them up. They had a yummy flavor, and I mixed up some yummy Asian veggies to go on the side- I used broccoli, zucchini, peppers, carrots, and onions, and I flavored it with teriyaki sauce and thickened it with a bit of cornstarch—nothing too fancy, but it made a great side dish with the steaks.
    Asian Marinated Steak (grouprecipes.com)
    Ingredients
    • 1/4 c low-sodium soy sauce
    • 2 tsp liquid honey
    • 1 tsp ground ginger
    • 2 tsp lemon zest
    • 2 minced cloves garlic
    • 1 tbsp red-wine vinegar
    • pinch crushed chili flakes
    • 1 lb beef flank steak
    How to make it
    • Mix all ingredients in a Ziploc baggie.
    • Add steak and turn to coat.
    • Refrigerate 24 hours.
    • Bring out meat from fridge, let stand 30 minutes.
    • Pat steak dry, place under broiler or on hot grill 4 minutes a side.
    • Remove from heat, let stand 5 minutes before cutting and serving.

    Friday, April 8, 2011

    Cheesy Beef and Pasta Skillet

    IMG_2215

    This is a nice quick one for a busy night—it seems like I can never get enough of those… even for the nights that I’m not that busy. :) I love that on the Kraft site, I can just plug in a couple ingredients I might have and they can generate a recipe for me. I didn’t have VELVEETA cheese, so I just ended up leaving that out and sprinkling grated cheese on at the end. It was pretty tasty.

    Cheesy Beef and Pasta Skillet (kraftfoods.com)

    • 1/2 lb. extra lean ground beef
    • 1/2 cup chopped onions
    • 1 tsp. ground cumin
    • 1 tsp. chili powder
    • 1 can (14-1/2 oz.) no-salt-added diced tomatoes, undrained
    • 1/2 cup water
    • 1 cup penne pasta, uncooked
    • 1 yellow bell pepper, chopped (I used red bell peppers, because that is what I had on hand.)
    • 2 oz. VELVEETA 2% Milk Pasteurized Prepared Cheese Product, cut into 1/2-inch cubes
    • 2 Tbsp. chopped cilantro

    Make It

    COOK meat with onions, cumin and chili powder in large skillet on medium-high heat 5 min. or until meat is no longer pink, stirring occasionally.

    ADD tomatoes, water, pasta and peppers; stir. Bring to boil. Reduce heat to medium-low; cover. Simmer 18 to 20 min. or until pasta is tender and most of the liquid is absorbed.

    STIR in VELVEETA; cook 2 min. or until melted, stirring occasionally. Sprinkle with cilantro.

    Kraft Kitchens Tips

    Add 1/4 tsp. crushed red pepper along with the onions, cumin and chili powder.

    Substitute a green bell pepper for the yellow pepper.

    Tuesday, April 5, 2011

    Strawberry Mango Lime Syrup

    IMG_2185

    I’m just coming out of three birthday’s in a row, so I’ve got some catching up to do!

    Is Strawberry-Mango combination truly such a novelty? (I search and could not find!) What a pair they make! I basically had to make this syrup recipe up. It was delicious! Now you can thank me tomorrow morning for this priceless little invention as you are spooning it over your warm pancakes. :)

    Strawberry Mango Lime Syrup (By Lyd)

    • 4 cups chopped ripe mango, from 2 (1-pound) mangoes
    • 1 cup fresh strawberries, chopped
    • 1/2 cup sugar
    • 1 and 1/2 cup water
    • 2 tablespoons fresh lime juice, or to taste
    • 2-3 tablespoons cornstarch
    • pinch of cinnamon

    In a small pot, stir cool water and cornstarch together until well mixed. Turn on heat to medium. Add sugar, lime and cinnamon and bring to a boil. Reduce heat and add fruit. Don’t over cook the fruit—unless you like it that way- I just like mine a little fresher.

    IMG_2190

    Lyd’s Confession:

    I have never properly cut up a mango before, so I turned to good old YouTube for a tutorial… thought I would share in case you are in the same boat. :)

    Thursday, March 31, 2011

    Robot Birthday Cupcakes

    IMG_2160

    I have a SUPER creative friend! These are the cupcakes she made for her sons fun Robot Birthday Party, and I just had to share because I thought it was such a cute idea. She just printed off cute little robots and rockets for the colorful cupcakes- it was so fun! The kids made those cute little paper bag robots with foam stickers- it was really cute!

    IMG_2159

    IMG_2161

    Tuesday, March 29, 2011

    Daring Baker’s Challenge: BLUEBERRY-BANANA FILLED MERINGUE COFFEE CAKE

    IMG_2239

    IMG_2240

    The March 2011 Daring Baker’s Challenge was hosted by Ria of Ria’s Collection and Jamie of Life’s a Feast. Ria and Jamie challenged The Daring Bakers to bake a yeasted Meringue Coffee Cake.

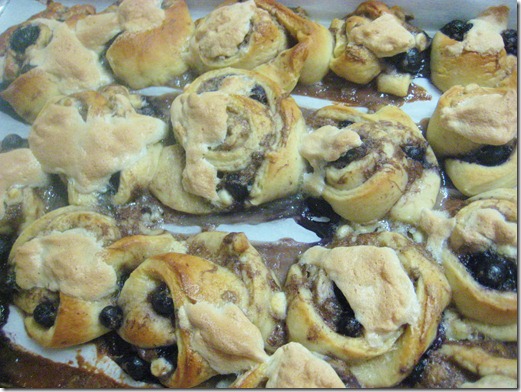
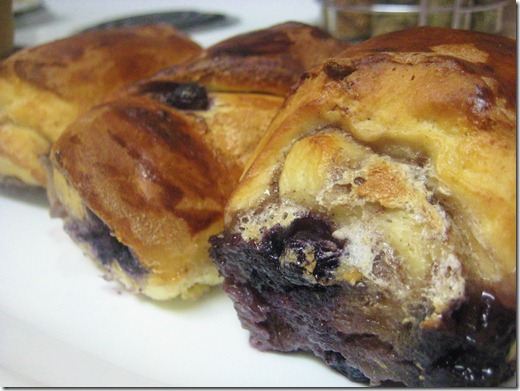
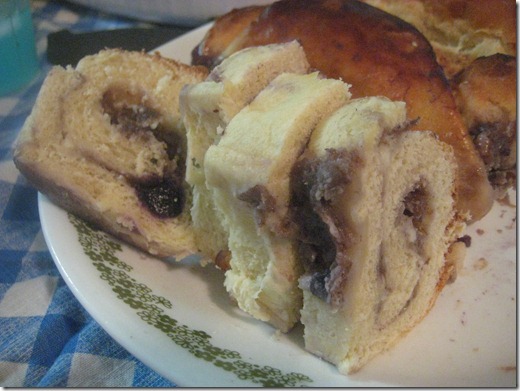
    WHAT A TREAT! This ended up being a DELICIOUS challenge- I’m a bit late on posting it, because I wanted to use it for my son’s birthday cake. (We have three birthdays right in a row, so a variety in cakes is most appealing. :) Plus he is little enough that he didn’t care.) I had fun trying a filling version of my own that ended up working pretty well- even though it was a little bit of a hot, sticky mess. :) It was quite a bit more runny (because of the mashed bananas) than I think it was supposed to be, but it has such a moist, sweet flavor in the end! It reminded me of the Over-the-Top Blueberry Bread Pudding or the Banana Chocolate Chip Bread Pudding I made a while back. (Both of which I liked very much, I might add.) I will say that the texture did not fit what I conjure up to be “coffee cake” at all. It was more like a cinnamon roll. I picture coffee cake to be more like a… well, cake. :) I am certainly not complaining though. Hope you give this one a try- just for fun. It was a lot of work, but a whole lot of delicious, too!
    IMG_2241

    IMG_2273

    BLUEBERRY-BANANA FILLED MERINGUE COFFEE CAKE
    Makes 2 round coffee cakes, each approximately 10 inches in diameter
    The recipe can easily be halved to make one round coffee cake.

    (*Might I add that, as you can see, I didn’t make “rounds of coffee cake.” My filling was just too messy, so I ended up emprovising with cinnamon rolls and little rolled loaves. With a drying middle mixture, I think the “rounds” would be great.)

    Ingredients
    For the yeast coffee cake dough:

    4 cups (600 g / 1.5 lbs.) flour
    ¼ cup (55 g / 2 oz.) sugar
    ¾ teaspoon (5 g / ¼ oz.) salt
    1 package (2 ¼ teaspoons / 7 g / less than an ounce) active dried yeast
    ¾ cup (180 ml / 6 fl. oz.) whole milk
    ¼ cup (60 ml / 2 fl. oz. water (doesn’t matter what temperature)
    ½ cup (135 g / 4.75 oz.) unsalted butter at room temperature
    2 large eggs at room temperature

    (I also added a bit of nutmeg to the dough- it gave it a good flavor.)

    For the meringue: (I loved the meringue! It was so hard for me not to snitch- I’m pregnant and I’m not supposed to do the “raw egg” thing, but it was too hard! Good stuff!)

    3 large egg whites at room temperature
    ¼ teaspoon salt
    ½ teaspoon vanilla
    ½ cup (110 g / 4 oz.) sugar

    For the filling:

    Lyd’s version:

    • 1 cup blueberries
    • 1/4 cup granulated sugar
    • 1 teaspoon ground cinnamon
    • 1/2 cup white chocolate
    • 3 very ripe mashed bananas

    Directions:

    Prepare the dough:

    In a large mixing bowl, combine 1 ½ cups (230 g) of the flour, the sugar, salt and yeast.

    In a saucepan, combine the milk, water and butter and heat over medium heat until warm and the butter is just melted.

    With an electric mixer on low speed, gradually add the warm liquid to the flour/yeast mixture, beating until well blended. Increase mixer speed to medium and beat 2 minutes. Add the eggs and 1 cup (150 g) flour and beat for 2 more minutes.

    Using a wooden spoon, stir in enough of the remaining flour to make a dough that holds together. Turn out onto a floured surface (use any of the 1 ½ cups of flour remaining) and knead the dough for 8 to 10 minutes until the dough is soft, smooth, sexy and elastic, keeping the work surface floured and adding extra flour as needed.

    Place the dough in a lightly greased (I use vegetable oil) bowl, turning to coat all sides. Cover the bowl with plastic wrap and a kitchen towel and let rise until double in bulk, 45 – 60 minutes. The rising time will depend on the type of yeast you use.

    Prepare your filling:In a small bowl, combine the cinnamon and sugar for the filling if using. You can add the chopped nuts to this if you like, but I find it easier to sprinkle on both the nuts and the chocolate separately.

    Once the dough has doubled, make the meringue:
    In a clean mixing bowl – ideally a plastic or metal bowl so the egg whites adhere to the side (they slip on glass) and you don’t end up with liquid remaining in the bottom – beat the egg whites with the salt, first on low speed for 30 seconds, then increase to high and continue beating until foamy and opaque. Add the vanilla then start adding the ½ cup sugar, a tablespoon at a time as you beat, until very stiff, glossy peaks form.

    Assemble the Coffee Cakes:

    Line 2 baking/cookie sheets with parchment paper.

    Punch down the dough and divide in half. On a lightly floured surface, working one piece of the dough at a time (keep the other half of the dough wrapped in plastic), roll out the dough into a 20 x 10-inch (about 51 x 25 ½ cm) rectangle. Spread half of the meringue evenly over the rectangle up to about 1/2-inch (3/4 cm) from the edges. Sprinkle half of your filling of choice evenly over the meringue (ex: half of the cinnamon-sugar followed by half the chopped nuts and half of the chocolate chips/chopped chocolate).

    Now, roll up the dough jellyroll style, from the long side. Pinch the seam closed to seal. Very carefully transfer the filled log to one of the lined cookie sheets, seam side down. Bring the ends of the log around and seal the ends together, forming a ring, tucking one end into the other and pinching to seal.

    Using kitchen scissors or a sharp knife (although scissors are easier), make cuts along the outside edge at 1-inch (2 ½ cm) intervals. Make them as shallow or as deep as desired but don’t be afraid to cut deep into the ring.

    Repeat with the remaining dough, meringue and fillings.

    Cover the 2 coffee cakes with plastic wrap and allow them to rise again for 45 to 60 minutes.

    Preheat the oven to 350°F (180°C).

    Brush the tops of the coffee cakes with the egg wash. Bake in the preheated oven for 25 to 30 minutes until risen and golden brown. The dough should sound hollow when tapped.

    Remove from the oven and slide the parchment paper off the cookie sheets onto the table. Very gently loosen the coffee cakes from the paper with a large spatula and carefully slide the cakes off onto cooling racks. Allow to cool.

    Just before serving, dust the tops of the coffee cakes with confectioner’s sugar as well as cocoa powder if using chocolate in the filling. These are best eaten fresh, the same day or the next day.

    IMG_2228

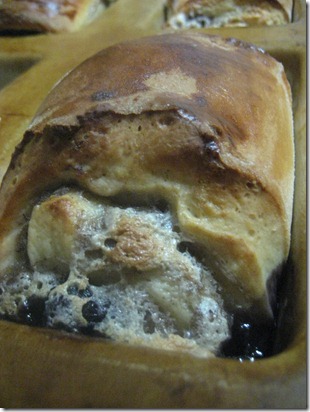
    (See- check out this oozing mess of sweetness- it just didn’t want to roll up pretty… and it wasn’t. But it made up for it in flavor. :)

    IMG_2231

    IMG_2232

    He liked his birthday cake, but he really had trouble blowing out the candles. :)

    IMG_2270

    Sunday, March 27, 2011

    Chocolate, Peanut Butter and Marshmallow Pudding Cookies

    IMG_2118

    My friend Bekah shared these AMAZING cookies at a girls night. HEAVENLY! She found the recipe from picky-palate.com, a really cute site full of some yummy, incredible, and seemingly a-bit-unhealthy recipes. :) (I just want to know who could possibly be picky using ingredients like that!) Watch out, because these are DANGEROUS! They are just such a perfect mix of gooey chocolate and peanut butter, that it is hard to muster up enough self control to stop at just one. Good luck, hope you’re a better man/woman than me! :)

    Chocolate, Peanut Butter and Marshmallow Pudding Cookies

    2 sticks softened butter

    1/2 cup granulated sugar

    1/2 cup packed light brown sugar

    2 eggs

    1 tablespoon vanilla

    2 1/4 cups all-purpose flour

    1 teaspoon baking soda

    1/2 teaspoon kosher salt

    4 oz box instant chocolate pudding mix

    10 oz bag peanut butter chips

    1 1/2 cups mini marshmallows

    1. Preheat oven to 350 degrees F. and line a large baking sheet with parchment paper or line with a silpat liner.

    2. In a stand or electric mixer, beat butter and sugars until light and fluffy. Beat in egg and vanilla until well combined.

    3. Place flour, baking soda, and salt into a large bowl, mixing to combine. Slowly add to wet ingredients along with chocolate pudding mix, peanut butter chips and marshmallows. Mix until just combined. With a medium cookie scoop, place onto baking sheet and bake for 10 to 12 minutes, until cooked through. Let cool for 10 minutes on baking sheet before transferring.

    Makes 3 dozen cookies

    Friday, March 25, 2011

    Balsamic Pork Cutlets

    IMG_2109

    Doug went nuts over this recipe, which kind of surprised me.  I know he likes mushrooms, but he’s not big on vinegar-anything.  I think of all the vinegars, balsamic is the most “noble.”  It isn’t over powering, but it definitely kicks it up a notch.  This recipe sounds more technical than it really is.  Just “shalax”… I think recipes that say “and cook for 1 minute” are silly- like you are going to set a timer or something.  I probably didn’t do everything completely perfect, but it tasted great and I think I got the “gist” of what they were going for… and BONUS—I didn’t stress myself out. :)

    Balsamic Pork Cutlets (Family Circle, March 2011)

    • 4 boneless pork chops, about 5 oz each, pounded to 1/2 inch thickness
    • 1/4 cup flour
    • 1 T olive oil
    • 1/2 cup chopped onion
    • 1 small red sweet pepper, seeds removed and chopped (I didn’t have these, but I bet they would have been good.)
    • 2 cloves garlic, chopped
    • 1 can (14.5 oz) broth
    • 1 can (6.5 oz) mushroom pieces, drained
    • 3 T balsamic vinegar
    • 1 tsp dried parsley
    • 1/2 tsp dried basil
    • 1/4 tsp black pepper
    • 1/8 tsp salt

    Coat pork chops with flour.  Reserve unused flour.  Heat oil in a large nonstick skillet over medium-high heat.  Add pork and cook 2 minutes per side.  Remove to plate.

    Add onion to skillet and cook 1 minute, stirring so onion doesn’t burn.  Add red pepper and garlic and cook one minute.  Stir 1 T of the reserved flour into broth and add to skillet; stir in mushrooms, vinegar, parsley, basil, black pepper, and salt.  Bring to a simmer.

    Add pork; cover and simmer on medium-low heat for 10 minutes, turning after 5 minutes. (I cooked the pork chops a little longer the first time around and then served them plain with the topping to put on as desired, because my girls recently developed an aversion to mushrooms.)

    Wednesday, March 23, 2011

    Let’s Go Banana Muffins!

    IMG_1730

    Sometimes I struggle with consistency. I get really good ideas, but they fizzle overtime. You might recall my “Muffin Monday” idea… that lasted one post. However, my love for muffins is unchanging! I have a thing for muffins! If they didn’t take so darn long to make in the mornings, I would have them every day! I like them healthy and I love them not. I like them here. I like them there… I like muffins anywhere! :) These muffins in particular where a complete success! I’m glad I came across such a good recipe. I added chocolate chips, because who, in their right mind, wouldn’t? They were just the perfect consistency, and my husband said they were the best muffins he had ever tasted… I can’t help but love that response. :) I doubled the recipe, but I don’t think they lasted more than a day… yes, we have a problem. (One that I don’t intend to fix any time soon. :)

    Makes 12 regular sized muffins.

    Banana Muffins Recipe (Joyofbaking.com)

    • 1 cup (115 grams) walnuts or pecans (Didn’t do the nuts, just for my hubby.)
    • 1 3/4 cups (230 grams) all-purpose flour (I made them half whole wheat and half white.)
    • 3/4 cup (150 grams) granulated white sugar
    • 1 teaspoons baking powder
    • 1/4 teaspoon baking soda
    • 1/4 teaspoon salt
    • 1 teaspoon ground cinnamon
    • 2 large eggs, lightly beaten
    • 1/2 cup (113 grams) unsalted butter, melted and cooled
    • 3 ripe large bananas (approximately 1 pound or 454 grams), mashed well (about 1-1/2 cups)
    • I added about 1/2 cup chocolate chips
    • 1 teaspoon pure vanilla extract

    Preheat oven to 350 degrees F (180 degrees C) and place the oven rack in the middle of the oven. Line a 12 - 1/2 cup muffin pan with paper liners or butter or spray with a non stick spray.

    Place the nuts on a baking sheet and bake for about 8 to 10 minutes or until lightly toasted. Let cool and then chop coarsely.

    In a large bowl combine the flour, sugar, baking powder, baking soda, salt, cinnamon, and nuts.

    In a medium-sized bowl combine the mashed bananas, eggs, melted butter, and vanilla. With a rubber spatula or wooden spoon, lightly fold the wet ingredients (banana mixture) into the dry ingredients just until combined and the batter is thick and chunky. (The important thing is not to over mix the batter. You do not want it smooth. Over mixing the batter will yield tough, rubbery bread.) Spoon the batter into the prepared muffin tins. Bake about 20 - 25 minutes or until a toothpick inserted in the center comes out clean. Place on a wire rack to cool for five minutes and then remove muffins from pan. Serve warm or at room temperature.

    IMG_1731

    IMG_1733

    Monday, March 21, 2011

    Guess I’ll Go Eat Worms... In Dirt Cups

    IMG_2124

    HAPPY SPRING!!! It was a rainy Monday today, and as I walked my daughter to school, I noticed all the little earthworms scattered here and there on the pavement- a sure fire sign of spring… hooray! Getting to school took an extra ten minutes, because I had to wait while my daughter hopelessly tried to rescue as many earthworms as possible. This may not be typical “kindergarten behavior,” but in her class it is. They just completed an exploration on earthworms and finished it off by compiling everything they learned into a darling little picture book full of all the earthworm facts they learned along the way. (The book is called E is for Earthworm, An A-z Guide, and proceeds go to future explorations.) They recently had a book signing and reading at a local bookstore, and I made these dirt cups for the crowd. It was a lot of fun and we’re pretty proud of our little “worm” expert. :) This isn’t any kind of gourmet recipe, but great for a spring treat that kids (and might I add adults as far as I’m concerned) are sure to love!

    Worm Dirt Cups

    • chocolate pudding mix, prepared
    • package of Oreos, crushed and crumbled
    • gummy worms

    In a cup or small bowl, layer prepared pudding with crushed Oreos over it. Top with gummy worm.

    IMG_2120

    IMG_2121

    It was crunch time and I called in the troops to help me get it all together. Doug came through in a big way! He always seems to do that for me when I bite off more then I can chew… literally in this case. :)

    IMG_2122

    IMG_2125

    Saturday, March 19, 2011

    Chicken Cacciatore

    IMG_2117

    I came across this recipe a while back, and it looked pretty tasty, so I thought I would give it a try, however, I turned it into a crockpot meal, so I definitely took some shortcuts. It was really easy going that route, and it turned out well. It’s also a healthy meal- always a plus!

    Chicken Cacciatore (Ellie Kriegor)

    • 4 skinless chicken breast halves on the bone, about 2 pounds
    • Salt
    • Freshly ground black pepper
    • 2 teaspoons olive oil
    • 1 medium onion, thinly sliced
    • 1 red bell pepper, thinly sliced
    • 1/2 pound white mushrooms, thinly sliced
    • 2 garlic cloves, minced
    • 1/2 cup dry white wine
    • 1 (14 1/2-ounce) can whole tomatoes in juice, chopped and juice reserved
    • 1/2 teaspoon of dried oregano
    • 1/8 teaspoon red pepper flakes or more, to taste

    *Lyd's Tips: I didn’t exactly follow these directions- I turned mine into a crockpot meal and pretty much threw it all into the crockpot for a few hours. But I bet that if done properly like this, it would be even better. You know me… I like taking shortcuts.

    Rinse the chicken and pat dry with paper towels. Season the chicken with salt and pepper. Heat the oil in a saute pan over moderately high heat. Brown the chicken on both sides, about 8 minutes. Transfer the chicken to a plate and set aside. Reduce the heat to moderate. Add the onion and pepper, cover and cook, stirring occasionally, until the vegetables begin to soften, about 5 minutes. Add the mushrooms and cook, uncovered and stirring occasionally, until the mushrooms begin to brown. Add the garlic and cook, stirring, for 30 seconds. Add the wine and cook until reduced by half. Add the tomatoes and juice, oregano, red pepper flakes and 1/4 teaspoon of salt and simmer the mixture covered for 10 minutes.

    Return the chicken breasts to the pan and simmer, covered, until the chicken is just done, about 20 minutes longer.

    Tuesday, March 15, 2011

    Warm White Bean and Tuna Quesadillas

    IMG_2071

    I was about to make the “typical” tuna fish sandwich for lunch, but I found this recipe stuck to the top of a tuna can, and was quite inspired. I thought I would “make my own dang quesadillas.” I’m glad I shifted my thinking, because this ended up being surprisingly delicious. It was really easy, and all the family loved it. I also thought it was a great way to sneak in some beans and spinach, which, unfortunate I didn’t have much of. This makes a tasty fast lunch, and I think you’ll like the depth of flavor the lemon juice adds!

      Warm White Bean and Tuna Quesadillas (from Bumblebee.com)

      • 1 can (16 oz.) cannellini or white kidney beans, rinsed and drained
      • 2 cans (6 oz. ea.) tuna in spring water, drained and flaked
      • 1/4 cup Mayonnaise Dressing with Extra Virgin Olive Oil
      • 2 tsp. lemon juice
      • 1/4 tsp. salt
      • 4 (8-in.) fajita size flour tortillas
      • 4 slices Mozzarella or Provolone Cheese
      • 1 cup baby spinach leaves
      1. Lightly mash beans in medium bowl. Stir in tuna, Mayonnaise Dressing with Extra Virgin Olive Oil, lemon juice and salt. Evenly spread tuna salad onto 2 tortillas, then top with cheese, spinach and remaining tortillas.
      2. Cook in 10-inch nonstick skillet lightly sprayed with nonstick cooking spray over medium heat, turning once, 5 minutes or until golden and cheese is melted. Cut into wedges.

    Saturday, March 12, 2011

    If life gives you lemons, make Lemon Loaf…

    IMG_2060

    Here is ANOTHER winner from Megan! She brought this one to some activity a while back (most likely a baby shower :), and I thought it was fabulous! I really love the addition of the cranberries (I think I would add even more- I bet blueberries would be really good too), and I think a little citrus zest can make a world of difference in shortbread and muffins! I recently added some Lemon Extract to my collection, so I did add just a drop of that as well, just to intensify the yummy lemon flavor. It was a good thing I did, because I totally forgot to add the juice over the top. Still fabulous though! Thanks again Megan!

    *This recipe made 4 mini loaves.

    Lemon Loaf (from Megan Naess)

    1/3 c. margarine or butter
    1 c. sugar
    2 eggs
    1 tsp. Baking powder
    grated rind of 1 lemon, and the juice, separated
    1-1/2 c. flour
    ½ c. milk
    1/3 c. cherries or cranberries (can use chopped or whole according to preference)

    Cream margarine and sugar. Beat in eggs until combined and then add rest. Pour batter into 1 large loaf pan, or 2-3 small pans. Bake at 350° for 1 hour. When fully baked, remove loaf from pan and pour 1/8-1/4 c. sugar (again, to suit personal preference) dissolved in the juice of 1 lemon over the top of the loaf. Let cool completely.

    Thursday, March 10, 2011

    Split Pea Soup

    IMG_2032

    I thought this was a simple, yummy soup.  It had a nice flavor.  I added a couple vegetables like carrots and celery to make it go just a bit further.  Then I pureed them for a smoother texture.  I also added just a bit of chopped ham that I had.  The cornmeal muffins went well with this soup! :)


    Split Pea Soup (By Emeril Lagasse)

    • 1 tablespoon olive oil
    • 2 cups chopped yellow onions
    • Salt
    • Freshly ground black pepper
    • Crushed red pepper flakes
    • 1 tablespoon chopped garlic
    • 1 bay leaf
    • 1 pound dried green split peas, picked over and rinsed
    • 8 cups chicken broth
    • 1 cup milk
    • Hot Sauce

    In a large soup pot over medium-high heat, heat the oil. Add the onions. Season with salt, pepper, crushed red pepper. Saute for 2 minutes. Add the garlic, bay leaf, and split peas and cook, stirring, for 1 minute. Add the broth and bring to a boil, then reduce the heat to medium and simmer, stirring occasionally, for 45 minutes, until the peas are tender. Remove from the heat and let cool slightly. Remove the bay leaf and discard. Add the milk and, using a hand-held immersion blender, process until smooth. Add the hot sauce and serve hot.

    Wednesday, March 9, 2011

    Cornmeal Muffins

    IMG_2027

    1 Mix, 100 Muffins”… doesn’t that just sounds awesome! I recently won this great cookbook by Susanna Tee, at Bunco night. This book is full of muffin ideas! From sweet to savory. The beauty of this book is that every single recipe is based on the Basic Muffin Mix. I have had fun getting new muffin ideas! This was the first one I tried out, just because it sounded like it would go well with some soup I made… and because I was reading a “Pioneer… Westward Ho” kind of book, and whenever that happens, I feel like making homemade bread or Jonny Cake, cornmeal mush, or beans and salted pork. At least that was what happened when I read Little House on the Prairie. :) I am looking forward to finding some good new muffins to try out! These turned out great- it was fun to have the whole corn in there. I wouldn’t have thought of doing that. I do like a little bit more sweetness to my cornbread from some reason, so if I made them again, I might add a tablespoon of sugar, but all in all, a great place to start.

    Cornmeal Muffins (From 1 Mix, 100 Muffins cookbook)

    • Oil or melted butter for greasing
    • 1 1/4 c flour
    • 1 T baking powder
    • 1/8 tsp salt
    • freshly ground black pepper
    • 3/4 c yellow cornmeal
    • 2 large eggs
    • 1 c milk
    • 6 T sunflower oil or melted, cooled butter
    • 1 c frozen corn kernels (I just used 1 can, drained.)

    Preheat oven to 400. Grease or line a 12 cup muffin pan. Sift together flour, salt, baking powder, and pepper to taste into a large bowl. Stir in cornmeal.

    Lightly beat the eggs in a large bowl. Then Beat in milk and oil. Make a well in the center of dry ingredients and pour in the beaten liquid ingredients, and add the corn. Stir gently until just combined; do not over-mix.

    Spoon the batter into prepared muffin pan. Bake in the preheated oven for about 20 minutes, until well risen, golden brown, and firm to touch.

    Let the muffins cool in the pan for about 5 minutes, then serve warm.

    Monday, March 7, 2011

    Baked Lemon-Pepper Salmon with Rosemary Roasted Red Potatoes

    IMG_1992

    This is one of my favorite things to do with fish! My husband loves it. It makes a delicious healthy meal that is so easy to throw together, and ends up seeming quite gourmet! :) This fish is moist and tender and roasted red potatoes always make a great side dish! A very little prep goes a long way with this one!

    Baked Lemon-Pepper Salmon with Rosemary Roasted Red Potatoes

    For the Fish:

    Sprinkle both sides of fish with salt and lemon-pepper seasoning. You can also pour a little lemon juice over the top. Place the fish on tin foil and wrap it around, creating a tent, pretty much covering the top. Bake at 400 for about 30-45 minutes or until juices run clear and fish flakes apart.

    For the Potatoes:

    Just toss small or halved red potatoes in a bowl with olive oil. Sprinkle and toss in kosher salt, pepper, and dried rosemary. Spread foil over a baking sheet and spread potatoes evenly across. Bake at 400 for 40-50 minutes, or until tender and cooked through.

    *You can also add other veggies to the mix, like cut carrots, cauliflower, squash, sweet potatoes, or broccoli.

    Sunday, March 6, 2011

    Apple Pancakes

    IMG_1984

    Here comes yet another pancake recipe!  I love pancakes and they just keep coming… hot off the griddle, as my mom would say.  I liked the apple in these.
    Veronica’s Apple Pancakes (allrecipes.com)
    Ingredients
    • 1/4 cup butter, melted
    • 1 egg
    • 1 cup milk
    • 1 cup shredded tart apple
    • 1 1/4 cups all-purpose flour (I used whole wheat.)
    • 1 1/4 teaspoons baking powder
    • 1/4 teaspoon ground cinnamon
    • 1 tablespoon white sugar
    Directions
    1. In a large bowl, combine butter, egg, milk and apple. In a separate bowl, sift together flour, baking powder, cinnamon and sugar. Stir flour mixture into apple mixture, just until combined.
    2. Heat a lightly oiled griddle or frying pan over medium high heat. Pour or scoop the batter onto the griddle, using approximately 1/4 cup for each pancake. Brown on both sides and serve hot.

    Thursday, March 3, 2011

    Garden Bread


    IMG_1974

    “And why not throw the veggies straight into the bread?”  That is what you will ask yourself after trying this one out.  This loaf is perfect for toasted cheese sandwiches!  This was fresh and healthy, a great way to sneak the veggies in.  Be sure to refrigerate what you don’t eat the first day.  I found this in a great cookbook all about Homemade Food Gifts.  I love some of the ideas, and I thought this was a good one.  They suggested folding it in a cloth napkin and securing it with a napkin ring.

    (This recipe made 4 mini loaves.)

    GARDEN BREAD (Simply Homemade Food Gifts)

    2/3 cup water

    1/2 cup tomato juice

    2/3 cup coarsely shredded carrots

    3 T coarsely chopped green bell peppers

    3 T sliced green onions

    4 T butter or cooking oil

    4 cups bread flour

    1 1/2 tsp sugar

    1 tsp salt

    1/2 tsp dried basil, crushed

    1 tsp active dry yeast.

    Grease loaf pans. 

    With Bread Machine: Add the ingredients to a bread machine according to the manufacturer’s directions.  Select the basic white bread cycle.

    Without Bread Machine:  Add warm water and sugar to mixer.  Sprinkle yeast over the top and let it bubble and sit for about 10 minutes.  Add flour, oil, and salt.  Mix until dough forms.  Add remaining ingredients and mix until incorporated.  With so many loose ingredients, you might have do some of the needing by hand.  Form rounded loaves, and let rise 30 minutes-1 hour. (I like to turn my oven to warm and let it sit in there for about 15-30 minutes.  It rises much faster.)  Bake at 350 for about 30 minute.

    Tuesday, March 1, 2011

    Blueberry Oat Bars (or Blackberry if you happen to live around here :)

    IMG_1944

    Perhaps you might recall Megan’s Sweet Potato Casserole… or you might not, but
    Heavens to Betsy, I DO!!! Megan has never failed me yet, and the record still holds. (Just wait until I post her Lemon Loaf I just made!) I tried out this AMAZING dessert, and LOVED IT. I actually used some frozen blackberries I had put up after picking this fall. SO yummy! Thanks for the recipe, Megan… by all means, keep them coming!!!

    Blueberry Oat Bars (From Megan Naess)

    1-1/2 cups flour (I try to use whole wheat)
    1-1/2 cups quick cooking oats
    1-1/2 cups sugar, divided
    ½ teaspoon baking soda
    ¾ cup cold butter
    2 cups fresh or frozen blueberries
    2 tablespoons cornstarch
    2 tablespoons lemon juice

    In a bowl, combine flour, oats, 1 cup sugar and baking soda. Cut in butter until the mixture resembles coarse crumbs. Reserve 2 cups for topping. Press remaining crumb mixture into a greased 13-in. x 9-in. x 2-in. Baking pan; set aside.
    In a saucepan, combine blueberries, cornstarch, lemon juice, and remaining sugar. Bring to a boil;
    boil for 2 minutes, stirring constantly. Spread evenly over the crust. Sprinkle with the reserved crumb mixture. Bake at 375° for 25 minutes or until lightly browned. Cool before cutting. Yield: 2-1/2 to 3 dozen.
    Note: The last time I made this, I thought it needed more filling so I doubled the amount of blueberries and cornstarch, used the juice from one lemon, and I thought it was better that way. (I didn't add any more sugar to the blueberries.)