Showing posts with label Pie. Show all posts

Sunday, September 8, 2013

Fresh Fruit Tart


Yes- I know it screams USA all the way! and I bet your are saying to yourself, "where was this post for our 4th of July picnic?"  The answer... it was collecting digital dust in the "Food 2013" folder of my desktop, just waiting for me to blog it.  Life has been busy, and I'm running a bit late on posts.  So lets just pretend it's Independence Day and you're thoroughly impressed with my foodie display of patriotism, shall we? :)
So here is a lovely Fruit Tart in memory of the summer days that are all but gone.
I found this one on my cute Sis-in-law, Amy's blog.  It looked too good to pass up.  Maybe it was also because of the cute picture of my precious niece on the post.  I LOVED the crust.  It was SO EASY!  I recently got a food processor and it was a great easy crust recipe, that also tasted good.  I wasn't as crazy about the filling, and I think that was probably a lot my fault.  Hers looked lovely, but I just couldn't get my cream to whip and the cold made the butter chunk up and it was just kind of a runny, fatty mess.  But... it still tasted good and the fresh fruit make just about anything taste good.  It was a real treat... And a pretty one to boot!
Thanks for the recipe, Amy!

Fresh Fruit Tart
Tart Crust:
1/2 C. powdered sugar
1 1/2 C. flour
1 1/2 sticks of butter (3/4 C.)

Filling:
1 (8 oz.) package of cream cheese
1/4 C. brown sugar
1 C. whipping cream
1/2 C. powdered sugar
zest of about half and orange (add more if you want it to be more citrusy)

Topping:
strawberries
raspberries
black berries
fresh pineapple
kiwi
any other kind of fruit you would like (blueberries, peaches, oranges, pears, apples, mango, plums, apricots, etc).

1. Preheat oven to 350 F. Combine the crust ingredients in a food processor until it starts to ball up. Now, just use your fingers to press into a 12 inch tart pan with a removable bottom. If the crust seems a little thick, feel free to use a little bit less of the dough. I have actually halved the recipe before and made a thinner crust. Both ways are good! This crust is sweet and flaky and tasty, so thick or thin is delicious. 
2. Bake for about 12 minutes or until the crust is ever so lightly browned. It may take just a little longer, so just watch it. Let it cool completely before removing it from the pan. 
3. Beat together the cream cheese and brown sugar. Separately beat the whipping cream and powdered sugar together until medium peaks form and you have a nice whipped cream. Fold the whipped cream into the cream cheese mixture until combined. Fold in the orange zest. 
4. Once the crust is cool, top it with the cream topping. Slice up all the fruit and throw it on top. Just throw it on or make a pretty design with it. You will want to eat this fairly soon after you top it. 
 
 
Posted by Picasa

Thursday, December 6, 2012

Fresh Peach Dessert


Oh- I know I'm a little late for peaches... it's almost Christmas for pete's sake!  I am obviously behind and this post has been patiently waiting, but it was a MUST POST, so I didn't want to forget... and how could I?  It was heavenly!  Too heavenly to wait to be "in season" again. :)


Fresh Peach Dessert (My Most Delicious Dishes)
2/3 cup powdered sugar
3/4-1 cup butter, softened
2 pkg. graham crackers; crushed
12-14 medium peaches or 7-8 large; peeled & sliced
1 can sweetened condensed milk
1/4 cup lemon juice
1 pt. whipping cream (I don't use it all, maybe 3/4 of it)

Mix cracker crumbs, powdered sugar, & butter. Save a small amount to sprinkle on top, press the rest into the bottom of a glass 9 x 13 pan. Whip the cream and add a little vanilla and powdered sugar until set, set aside. Mix the sweetened condensed milk with lemon juice. Then place the peaches on the crust and pour the milk/lemon mixture on top. Spread the fresh cream on top of that and sprinkle with remaining crust. Refrigerate.

*This is so light and fresh, but you have to share it or half it because it is best if enjoyed in the first 24 hours!
 
Posted by Picasa

Tuesday, June 19, 2012

Spinach Pastry Diamonds


So "puff pastry" is probably not the most healthy direction to go after the last post. :)  However, my most recent meatless post was in February... of 2011.  Yes, it's time, and this was meatless, and it did turn out pretty well, which is saying something with the spinach volume.  I will say that it made a big batch and for some reason, the left-overs weren't as exciting. :)  But we did get our veggies in and wasn't too hard to make.  Off to a decent start.

Spinach Pastry Diamonds (Pepperidge Farm Puff Pastry)
2 tbsp. butter
1 medium onion, finely chopped (about 1/2 cup)
1 pkg. (10 ounces) frozen choppedspinach, thawed and squeezed dry
1 can (10 3/4 ounces) Campbell's® Condensed Cream of Chicken and Mushroom Soup
4 eggs
1 cup shredded Swiss cheese (about 4 ounces)
1/4 tsp. ground nutmeg
1 pkg. (17.3 ounces) Pepperidge Farm® Puff Pastry Sheets (2 sheets), thawed according to package directions
1 tbsp. water

Heat the oven to 375°F.
Heat the butter in a 2-quart saucepan over medium heat. Add the onion and cook until it's tender. Stir in the spinach.
Stir the soup, 3 eggs, cheese and nutmeg in a medium bowl. Stir in the spinach mixture.
Unfold 1 pastry sheet on lightly floured surface. Roll the pastry into a 13 x 9-inch rectangle. Place the pastry in a 13 x 9-inch baking dish. Spread the spinach mixture evenly over the pastry.
Roll the remaining pastry sheet into a 13 x 9-inch rectangle. Place the pastry on the spinach mixture and tuck under the edges. Stir the remaining egg and water in a small bowl with a fork. Brush the pastry with the egg mixture.
Bake the pastry for 40 minutes or until the pastry is golden brown. Cool the pastry in the baking dish on a wire rack for 15 minutes. Cut the pastry in a diamond pattern to make 35 pieces.

Wednesday, May 16, 2012

Banana Cream Pie (Healthy-er)


As you can see, this fabulous banana cream pie wasn't sitting around long enough for a big photo-shoot.  It was unbelievably delicious. You might recall my "Woman, make me a pie... right now!" post.  Well, on my birthday, I asked Doug to make me a pie right now (from scratch) and... HE DID!  I printed out a (healthier) recipe I've been wanting to try for a while--absolutely no idea why I would put it off.  I think this was the best darn banana cream pie I've had!  It was great.  I think part of that is because my husband follows instructions very closely and carefully... I on the other hand have probably become a bit cavalier in my baking. :)  And in my picture taking too apparently... but I assure you, not in my eating of pie.  Savored every minute.  It was a happy birthday indeed.

Banana Cream Pie (Ellie Krieger)
Cooking spray
12 graham cracker squares (6 full sheets)
2 tablespoons butter, softened
1 1/2 teaspoons unflavored gelatin
3 tablespoons boiling water
1/3 cup, plus 1/2 teaspoon sugar
3 tablespoons all-purpose flour
2 egg yolks
1 1/2 cups 1 percent lowfat milk
1 teaspoon vanilla extract
2 cups sliced banana (3 medium bananas)
1/4 cup whipping cream
1/2 teaspoon sugar

Click here to see how she does it.
Preheat the oven to 350 degrees F.
(We just skipped this step and used a pre-made crust.) Spray a 9-inch pie plate with cooking spray. In a food processor, process graham crackers until finely ground. Add butter and 1 tablespoon of water, and process until the crumb clumps together. Press crumb mixture into bottom of pie plate and about 1/2-inch up the sides. Bake in the oven for 10 minutes, then let cool.
In the meantime, make the filling. Put the gelatin in a small bowl; add 3 tablespoons of boiling water and stir until gelatin is dissolved. In a medium saucepan, whisk together 1/3 cup of sugar and the flour. In a medium bowl lightly beat the milk and eggs together. Add the egg and milk mixture to the saucepan and whisk so the flour and sugar dissolve. Cook over a medium heat, stirring constantly, for 10 minutes, until mixture comes to a boil and has thickened. Stir in the vanilla extract and gelatin. Set aside to cool slightly.
Arrange the sliced bananas on the graham cracker crust and pour the pudding on top. Place in the refrigerator until the pudding has set, about 3 hours.
Whip the cream with an electric beater. When it is about halfway done, add 1/2 teaspoon of sugar, then continue whipping until fully whipped. Put the whipped cream in a plastic bag, concentrating it in 1 corner of the bag. Snip that corner off the bag and squeeze the whipped cream out of the bag in a decorative pattern around the pie.

Friday, April 13, 2012

Chicken & Bacon Tart


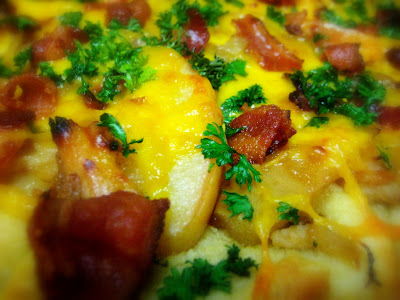
I'm such a Simlple and Delicious fan!  I just organized my magazines and I realized I've been a loyal subscriber for six years now!  Worth every penny to me.  Especially when they pull things out of the hat like this- who would have thought to use pepper jelly with something like this?  But somehow, someway, the taste combined with chicken, bacon, and apples just totally worked.  AND it allowed me to use that obscure little jar I've had sitting around for a year not know what to do with. (My inspiration for trying this one out.)  Do people really spread that on their toast?  Spicy peppers in salsa... YES!  Spicy peppers in jam... NO THANKS.  Or at least that is what I thought before this one... thank goodness someone came up with a good use for it.  This was one Doug suggested I make for company... I love when he says things like that. :)  This is a winner... strange pepper jelly included!

Chicken & Bacon Tart (Simple and Delicious/Taste of Home)
1/4 pound bacon strips, cut into thirds (I cut them a little smaller and I think they were more manageable.)
2 medium onions, halved and thinly sliced
2 medium apples, peeled and thinly sliced
1 package (9 ounces) ready-to-serve roasted chicken breast strips
1/4 cup jalapeno pepper jelly (I actually used mango pepper jelly)
1/2 teaspoon dried thyme
1/4 teaspoon salt
1 sheet frozen puff pastry, thawed
3/4 cup shredded cheddar cheese
1/4 teaspoon pepper
1 tablespoon minced fresh parsley
In a large skillet, cook bacon over medium heat until crisp. Remove to paper towels with a slotted spoon. Saute onions and apples in drippings until tender. Stir in the chicken, jelly, thyme and salt.
On a lightly floured surface, unfold puff pastry. Roll into a 10-in. x 9-in. rectangle. Transfer to a 15-in. x 10-in. x 1-in. parchment paper-lined baking sheet. Prick with a fork.
Spread chicken mixture over pastry to within 1 in. of edges. Sprinkle with cheese and pepper. Press edges with a fork, forming a decorative border.
Bake at 425° for 10 minutes. Sprinkle with bacon; bake 5-10 minutes longer or until golden brown. Sprinkle with parsley. Yield: 4 servings.
Nutritional Facts
1 piece equals 693 calories, 37 g fat (13 g saturated fat), 76 mg cholesterol, 1,023 mg sodium, 65 g carbohydrate, 7 g fiber, 28 g protein.
Posted by Picasa

Monday, January 16, 2012

Quiche Lorraine

Though eggs and I don't always get along, I find it hard to resist a hearty slice of quiche.  I've got a few quiche recipes stashed away in here, but why not try a new one?  I find I can usually count on Betty to deliver, and she definitely did on the filling part- delish, however I would not recommend this crust recipe.  I have tried it before and it hasn't turned out well both times, so this time I finally got smart and left a note in the margin to leave this darn crust recipe alone. :)  But forgive the crust and love the filling... like I did.  Mmmmm.


Quiche Lorraine (Betty Crocker)

Pastry

1 cup Gold Medal® all-purpose flour
1/4 teaspoon salt
1/3 cup plus 1 tablespoon shortening
2 to 3 tablespoons cold water

Filling

8 slices bacon, crisply cooked, crumbled (1/2 cup)
1 cup shredded Swiss cheese (4 oz)
1/3 cup finely chopped onion
4 large eggs
2 cups whipping cream or half-and-half
1/4 teaspoon salt
1/4 teaspoon pepper
1/8 teaspoon ground red pepper (cayenne)

In medium bowl, mix flour and salt. Cut in shortening, using pastry blender (or pulling 2 table knives through ingredients in opposite directions), until particles are size of small peas. Sprinkle with cold water, 1 tablespoon at a time, tossing with fork until all flour is moistened and pastry almost cleans side of bowl (1 to 2 teaspoons more water can be added if necessary). 
Gather pastry into a ball. Shape into flattened round on lightly floured surface. Wrap in plastic wrap; refrigerate about 45 minutes or until dough is firm and cold, yet pliable. This allows the shortening to become slightly firm, which helps make the baked pastry more flaky. If refrigerated longer, let pastry soften slightly before rolling.
Heat oven to 425°F. With floured rolling pin, roll pastry into round 2 inches larger than upside-down 9-inch quiche dish or glass pie plate. Fold pastry into fourths; place in quiche dish. Unfold and ease into dish, pressing firmly against bottom and side. Trim overhanging edge of pastry 1 inch from rim of pie plate. Fold and roll pastry under, even with plate; flute as desired.
Carefully line pastry with a double thickness of foil, gently pressing foil to bottom and side of pastry. Let foil extend over edge to prevent excessive browning. Bake 10 minutes. Carefully remove foil and bake 2 to 4 minutes longer or until pastry just begins to brown and has become set. If crust bubbles, gently push bubbles down with back of spoon.
Reduce oven temperature to 325°F. Sprinkle bacon, cheese and onion in pie crust. In medium bowl, beat eggs slightly; beat in remaining filling ingredients. Pour into quiche dish.
Bake 45 to 50 minutes or until knife inserted in center comes out clean. Let stand 10 minutes before serving.

Makes 6 servings

Saturday, October 22, 2011

Apple Pie Crumble Bars

I kind of did my own twist on this, and I was happy with the results. I have a yummy Taste of Home cookies recipe book, and I came across "Chocolate-Drizzled Cherry Bars" but for lack of cherry pie filling, we turned it into a fun harvest dessert and I used the pie filling that I put up last year. It was pretty delicious--a lot like a pie--and I liked the crumbles on top!

Apple Pie Crumble Bars


  • 2 cups all-purpose flour
  • 2 cups quick-cooking oats
  • 1-1/2 cups sugar
  • 1-1/4 cups butter, softened
  • 1 jar/can of apple pie filling
  • In a large bowl, combine the flour, oats, sugar and butter until crumbly. Set aside 1-1/2 cups for topping. Press remaining crumb mixture into an ungreased 13-in. x 9-in. baking dish. Bake at 350° for 15-18 minutes or until edges begin to brown.
  • Carefully spread pie filling over crust. Sprinkle with reserved crumb mixture. Bake 20-25 minutes longer or until edges and topping are lightly browned.
  • Cool completely on a wire rack. Yield: 3 dozen.

Posted by Picasa

Sunday, February 6, 2011

Chicken Pot Pie with Whole Wheat Pie Crust

I FORGOT THE CHICKEN! Honestly- take the chicken out and all you have is "pot pie" and how tempting does that sound? I couldn't believe I forgot it! It was a long day though... I was just happy to put the top on and pop it in the oven... and it was at that moment that I realized I was missing a "key" ingredient. Despite my "forgetfulness", it tasted grand... happy news for the vegetarian. A yummy pie with or without the chicken. :) I just made a regular pie crust and subbed white for wheat, but admittedly, the crust wasn't amazing. It was a little dry and crumbly- I had to add more water to get it to hold together at all... I think I just needed to find a good whole wheat recipe. Still good though.

Chicken Pot Pie (Betty Crocker)
1 package (10 oz) frozen peas and carrots (I peeled and thinly sliced potatoes, carrots, celery, and added some frozen peas instead if the frozen package.)
1/3 cup butter
1/3 cup flour
1/3 cup chopped onion (Give me a break... do people really just chop up 1/3 cup and "reserve" the rest? Do a whole onion, I would sleep better if you did!)
1/2 tsp salt
1/2 tsp pepper
1 3/4 cup chicken broth
2/3 cup milk
2 1/2 to 3 cups cut-up cooked chicken or turkey (You almost forgot too, didn't you? :)
Pastry for 9-inch Two-Crust Pie

1. Rinse frozen peas and carrots in cold water to separate; drain. (Or cut up all those veggies I mentioned above.)
2. Melt butter in 2-quart saucepan over medium heat. Stir in flour, onion, salt, and pepper (and all the veggies if you do it that way.) Cook, stirring constantly, until mixture is bubbly; remove from heat. Stir in broth and milk. Heat to boiling, stirring constantly. Boil and stir 1 minute, Stir in chicken (yes chicken!) and peas and carrots; remove from heat.
3. Heat oven to 425.
4. Make pastry. Roll two-thirds of the pasty unto 13-inch squares. Ease unto ungreased square pan (9x9x2 inches) (I just did mine in a pie dish and I doubled the recipe so I would have two pies.) Pour chicken mixture into pastry lined pan.
5. Roll remaining pastry 11 inch square. Cut out designs with 1 inch cookie cutter. Place square over chicken mixture. Arrange cutouts on pastry. Turn edges of pastry under and flute.
6. Bake about 35 minutes or until golden brown.
Posted by Picasa

Monday, December 6, 2010

Bottled Apple Pie Filling

"The Lord is good to me and so I thank the Lord,
For giving me the things I need, the sun and rain and an apple-seed, oh he's been good to me."

I owe the Lord so much, for everything I see.
I'm certain if it weren't for him, there'd be no apples on this limb, oh he's been good to me."

I wake up everyday as happy as can be,
Because I know that with his care my apple trees will still be there, oh he's been good to me."

As I was posting this one, I just couldn't help but hum this little song of my youth. I remember watching the Disney Johny Appleseed show many a time, and I guess it just sums up how I feel about the lovely little fruit! My parents used to call me the apple girl, and I could always count on a big bag of apples by my stocking for Christmas. :) (This was all before my permanent front teach got knocked out and the whole biting thing got a lot harder... but I still love them cut up. :) All in all, you just can't beat a good old-fashioned apple pie, can you?!

This is one I have been meaning to post for a long time! So what makes this post so special? I've already posted some excellent apple pies and why more? Well- you do this in a big old batch and bottle them up for later- work now, feast later... then feast again... and again. My friend Brittany and I put up about 30 quarts of apple pie filling this Fall. We had a little peeler/corer that really helped speed things up. This pie filling has an excellent flavor- that store bought stuff doesn't even come close! (I think that little bit of lemon juice makes a big difference!) and it makes the EASIEST dessert- all the work is already done. You just open a jar and you can make an apple pie, apple-crisp, apple-brown-betty, apple cobbler and more! You won't regret the extra work for the yumminess later!

Canned Apple Pie Filling (makes about 6 quarts)
6lbs of apples = 24 cups

4 1/2 cups sugar
1 cup cornstarch
2 tsp cinnamon
1/4 tsp nutmeg
1 tsp salt
10 cups water
3 T lemon juice
24 cups apples (cored, peeled, and sliced)

In a large pan, blend first four ingredients. Add salt. Stir in water. Cook and stir until clear, thick, bubbly, and starting to foam at the top. Add raw apples to syrup and heat through. Add lemon juice. Pack apples in 1 quart jars leaving 1 inch lip space. (Fill with any extra hot syrup left over). Clean of rims, place on lids, and screw rings on tightly. Place jars in canner and fill above the rims with warm/hot water. Process in a canning/water-bath for 20 to 30 minutes from the time water is boiling.) Carefully remove and let rest until fully sealed. (Brittany sometimes flips hers over if they didn't seal and the heat from the inside usually finishes to job.)
Posted by Picasa

Monday, November 29, 2010

Cheesy Chicken Empanadas

Now here is a tasty little number! These are super easy to make and they tasted excellent! They make a great appetizer or meal. I made them on a day when I was grocery shopping and I just remembered to pick up the pre-made pie crust. I even cut corners by picking up a rotisserie chicken, so it ended up being a "no-fuss" meal. You can't help but love those. :)

Cheesy Chicken Empanadas (kraftrecipes.com)
2 cups shredded cooked chicken breasts
1 cup KRAFT Mexican Style Finely Shredded Four Cheese
1/3 cup KRAFT SANDWICH SHOP Chipotle Flavored Reduced Fat Mayonnaise (This is probably not your pantry staple, so if that is that case, you can do what I did, and substitute sour cream and salsa. It gave it a great flavor.)
2 Tbsp. chopped fresh cilantro
1 egg
1 Tbsp. water
1 pkg. (14.1 oz.) ready-to-use refrigerated pie crusts (2 crusts)
1 tsp. chili powder

HEAT oven to 375ºF.
COMBINE first 4 ingredients. Whisk egg and water until well blended.
UNROLL pie crusts on lightly floured surface. Use rolling pin to roll each to 12-inch circle. Cut each crust into 8 (4-inch) circles with biscuit cutter, re-rolling dough as needed. Place on parchment-covered baking sheets. Spoon 2 Tbsp. chicken mixture onto center of each circle; brush edge with egg. Fold dough circles in half. Press tops lightly to remove excess air; seal edges with fork. Brush tops with remaining egg. Sprinkle with chili powder.
BAKE 15 min. or until golden brown.
Posted by Picasa

Saturday, November 27, 2010

Novermber Daring Bakers: Pasta Frolla for a Crostata (Don't panic... it's just a tart. :)

My cute Sister-in-Law Amy, talked me into joining The Daring Kitchen. I had heard of this site a while back, but I had never taken the time to figure out how it worked. When she explained it to me, it sounded like a lot of fun! I signed up and anxiously awaited my first challenge... only to be a little intimidated (dare I even go so far as to say disapointed) when I saw our first "fancy" challenge. My initial thought was, "Oh great... this is going to be one of those recipes I will never use, with a mouth-full-of-a-name that I can't even begin to pronounce." I COULD NOT HAVE BEEN MORE WRONG! (... about the recipe- I still can't quite take on the name. :) I took the challenge and I have made it four times because I liked it so much.

The 2010 November Daring Bakers’ challenge was hosted by Simona of briciole. She chose to challenge Daring Bakers’ to make pasta frolla for a crostata. She used her own experience as a source, as well as information from Pellegrino Artusi’s Science in the Kitchen and the Art of Eating Well.

First of all... if you are getting caught up on the fancy name thing like I was, lets just call this a "perfect" tart. There... now a tart is something you can make, right... or if you can't... you very soon will!!!
I was surprised at how simple the process was! As you can see in the above picture, I wasn't very carefull about rolling my crust out thin- I just wasn't careful in general, but I found I kind of liked the thicker crust- it was almost like a cookie. I think the lemon zest makes a huge difference! It adds such a great balance of flavor- especially when you have a really sweet fillling.

*For my fillings, I used my homemade blackberry jam, frozen blackberries, lemon juice, and a pinch of sugar. And for the apple tarts, I used an amazing pie filling recipe my friend shared. We put up over 20 quarts of it. I'll be sharing that recipe soon- it was delicious! But you can do just about anything... fruit, jam preserves, cheesecake with fresh fruit, mousse, pudding, or any kind of pie filling. Pretty much you can't go wrong!

*I also wanted to add that when I made this the first time, I didn't have a tart pan with a removable bottom. I just used a cake pan. It didn't come out very well, but it cooked up fine. I liked the recipe so much, though, that I came across one at the local "Salvation Army" store and I bought it for a buck. :) I figured I would definitely be making this one again. It worked perfectly, too. :)

Pasta Frolla for a Crostata by Simona of briciole
  • 1/2 C. minus 1 TBSP. superfine sugar or a scant 3/4 C. of powdered sugar.
  • 1 3/4 C. flour
  • a pinch of salt
  • 1 stick cold butter, cut into small pieces
  • grated zest of half a lemon
  • 1 large egg and 1 large egg yolk, lightly beaten in a small bowl.

1. Whisk together sugar, flour, and salt in a bowl.

2. Cut the butter into the flour mixture using a fork, fingers, or a pastry cutter until the mixture has the consistency of coarse crumbs.

3. Beat together eggs lightly. Make a well in the center of the mounded flour and butter mixture and pour the beaten eggs into it (reserve about a teaspoon of the egg mixture for glazing purposes later on)

4. Sprinkle lemon zest over top. Use a fork to incorporate the liquid into the solid ingredients, and then use your fingers.

5. Knead lightly just until the dough come together in a ball. Shape the dough into a flat disk and wrap in plastic wrap. Place the dough in the refrigerator and chill for at least two hours. You may refrigerate the dough over night.

6. Take out of the fridge and unwrap. Cut away 1/4 of the dough and reserve to make the lattice top of the crostata. Refrigerate this dough while you work on the tart base. On top of the plastic wrap, roll out the dough into a circle about 1/8th inch thick. Center the dough over the pan and press down. Poke wholes into the base of the dough with a fork. Trim away excess dough around the side.

7. Spread what ever filling you want into the middle and bake for about 25 minutes at 350 F or until the crust is golden brown. If you need to fill it after the crust is cooked, blind bake the crust. To do this, place parchment paper or aluminum foil over the crust and fill the tart with pie weights ( or just use dried beans). Then cool and fill the tart with what ever you want.


Posted by Picasa

Monday, November 22, 2010

Sugarless Apple Pie


Happy day! An amazing SUGARLESS pie- just in time for the Thanksgiving feast! (Amazingly, it can be done! :) My friend brought this over for dessert and it won both my husband and I over. It is excellent. She added dried cranberries to the mix, and that was definitely my favorite part! It added texture, color, and a fun sweet/tart flavor that I loved! Oh- and did I mention the whole wheat crust? How cool it that?! My husband really liked it. Anyway- I was so happy she shared her fun recipe. (Don't you love her fun pie dish?) Hope you enjoy! Happy Thanksgiving!!! (And BIG THANKS Crystal!)

Sugarless Apple Pie (From Crystal Willock)
Preheat: 425

Crust:
2 cup white flour
2 cup wholewheat flour
1 cup oil
1 cup ice water

Sift flour and salt together.
Beat oil and ice water together until emulsified.
Pour over flour all at once
Toss to mix lightly, form into a ball
Divide in half and roll out each half between wax paper
Fill pie pan

Pie Filling:
6 oz Frozen Unsweetened Apple Juice
1Tbs. Cinnamon
2 Tbs. Cornstarch
1 Tbs. Butter
1 Tbs. Vanilla Extract
6 medium granny smith apples, peeled, cored and sliced.
½-1 cup dried cranberries (or other dried fruit)

Combine apple juice and cornstarch in large sauce pan, stirring well.
Cook over medium heat until thick and bubbly. STIR OFTEN!
Stir in butter, cinnamon, and vanilla.
Add apples, tossing well to coat.
Add Cranberries, stir all together and cook about 3 minuets.
Fill pastry-lined pie pan.
Cover with top crust
Cut pretty pattern for steam to escape

Cook about 30-45 minutes.
Posted by Picasa

Wednesday, October 27, 2010

Enchilada Pie


I came across this recipe a while back, and for some reason I just never got around to making it, so I'm really glad I stumbled across it twice because this makes a great healthy meal that feeds a big crew. (Not to mention, it is quite delicious.) I like that is holds so many veggies, but you don't feel like that is all you are eating. This is a great one!

Enchilada Pie (Women's Day Magazine)
1 Tbsp olive oil
1 cup chopped green or red pepper
1 lb lean ground turkey
2 tsp ground cumin
1 can (14-1⁄2 or 15 oz) diced tomatoes with garlic and onion
1⁄2 cup enchilada sauce
1 can (4 oz) chopped green chiles
1 cup frozen corn kernels
3⁄4 cup canned sliced black olives
Four 6- to 8-in. corn or flour tortillas
1 bag (8 oz) shredded light 4-cheese Mexican blend
Toppings: sour cream, and chopped tomato, onion and scallion

1. You’ll need a round 3-qt glass baking dish (casserole).2. Heat oil in a large nonstick skillet over medium heat. Add pepper; sauté 3 to 4 minutes. Add turkey; cook, breaking up chunks, 5 minutes or until no longer pink. Stir in cumin, tomatoes, enchilada sauce and chiles.3. Bring to a simmer and cook 10 minutes to develop flavors. Off heat, stir in corn and olives.4. Heat oven to 350°F.5. To assemble: Line bottom of baking dish with 2 tortillas. Top with 1⁄2 the meat mixture, then about 1⁄3 the cheese. Top with a tortilla, the remaining meat filling, 1⁄2 the remaining cheese, then remaining tortilla. Cover with foil.6. Bake 30 minutes. Uncover, sprinkle with remaining cheese and bake 10 minutes or until filing bubbles. Cool 5 to 10 min. before cutting in wedges. Serve with toppings.
Posted by Picasa

Tuesday, October 5, 2010

Garden Tomato Pizza Pie

I was in the middle of making home-made bread and canning tomatoes, when I got the brillant idea to combine the two for our lunch. I had just a little bit of exta dough, and I decided that a hearty whole wheat crust makes a happy match with garden fresh tomatoes! The only thing that would have maybe bumped this up a notch is maybe a bit of bacon. Mmmmm... this is a good one!

Garden Tomato Pizza Pie (By Lyd)
about 1 cup uncooked whole wheat bread dough
1-2 fresh ripe tomatoes, sliced
1/2 cup grated mozzarella or monetary jack cheese
1/2 tsp kosher salt
1/2 tsp pizza seasoning
a pinch of basil, oregano, and Italian seasoning (if desired)

Spread the bread dough by hand on a greased pie pan. Bake for about 10 minutes. Pull the dough out and spread with tomatoes. Sprinkle salt, cheese and seasonings over top. Bake for an additional 10-15 minutes. Slice, and eat warm!
Posted by Picasa

Sunday, September 5, 2010

Perfect Pear Crisp


I saw a picture of this pear Crisp and it made my mouth water, so I had to make it. I know it probably wasn't the same, but I didn't have any fresh pears, so I used canned pears (2 or 3 large cans). It was EASY and it cooked up faster- but pears are in season so take advantage! I really liked the nuts on top. I think the topping needed oats though. All-in-all, a delicious dessert dish! (I even made real whip cream! Mmmmm!)

Perfect Pear Crisp (kraftrecipes.com)
1 Lemon
1/2 cup Granulated sugar, divided
1/3 cup plus 2 Tbsp. flour, divided
1 tsp. Ground cinnamon, divided
8 fresh pears (about 2-1/2 lb.), peeled, cut into 1-inch chunks
1/4 cup packed brown sugar
1/3 cup cold butter, cut up
1/2 cup PLANTERS Sliced Almonds
1 cup thawed COOL WHIP Whipped Topping

HEAT oven to 375ºF.
GRATE enough lemon peel to measure 1/2 tsp. zest. Squeeze enough juice to measure 1-1/2 Tbsp. Mix 1/4 cup granulated sugar, 2 Tbsp. flour and 1/2 tsp. cinnamon in large bowl. Add pears, lemon zest and juice; toss until pears are evenly coated. Spoon into 8-inch square baking dish.
MIX brown sugar and remaining flour, granulated sugar and cinnamon in medium bowl. Cut in butter with pastry blender or 2 knives until mixture forms coarse crumbs. Stir in nuts; sprinkle over pears.
BAKE 40 to 45 min. or until topping is golden brown and pears are hot and bubbly. Serve topped with COOL WHIP.

Kraft Kitchens Tips

Bake dessert in 9-inch square baking dish or shallow 2-qt. casserole instead of the 8-inch square baking dish.

What To Look For When Purchasing Pears
Look for pears with a fragrant aroma and coloring characteristic of their variety. Skins should be free from cuts and bruises. A ripe pear is one that feels slightly firm, but gives a bit to gentle pressure at the stem end.
Posted by Picasa

Saturday, August 28, 2010

Woman! Bake Me A Pie... RIIIIGHT NOW!


THE FACTS ARE THESE... this pie is too good to miss! Have you seen "Pushing Daisies"? It is a cute, fanciful TV show that aired a while back. Don't plan on closure at the end of it all- total cliff hanger, but even still- I really enjoyed the ride! It is just clean and clever, out of the ordinary. The main character is Ned, the pie maker and owner of the "The Pie Hole." My husband and I watched the whole first season just dying for at least one bite of his bright, beautiful pies... but alas... I had to make my own, and I did some hunting for what I think turned out to be some GREAT recipes! (At least the best I have ever made- the crust turned out beautifully and I have never made a good crust.) My husband had a friend that said that his only requirement for his "wife-to-be" was that he could just say, "Woman! Bake Me A Pie... RIIIIGHT NOW!" and she would do so... immediately. :) Every once in a while, Doug will say it to me... and every once in a while, I indulge him.
I also wanted to but a plug in for this little beauty. My sister-in-law Amy also mentioned it- and I can't for the life of me remember who told us about it, so I am sending a "THANK YOU" into the abyss! It is SO HANDY! It works wonderfully well and you don't have to worry about keeping fresh buttermilk and always having it on hand. Great for pancakes or baking or anything. I am fully converted!

Buttermilk Pie Crust

By Joy the Baker (click on the link for her great step by step visual tutorial.)

makes a double crusted 9-inch pie crust

Print this Recipe!

2 sticks (8 ounces) cold unsalted butter

2 1/2 (12 ounces) cups all purpose flour

1 Tablespoon sugar

1 teaspoon salt

1/2 cup (5 to 6 ounces) buttermilk

1. Cut the butter into 1-inch pieces and place in the freezer to chill for 15 minutes. Measure out the buttermilk and store in the refrigerator to keep it cold (you could even put it in the freezer for a few minutes too).

2. Sift together the flour, sugar and salt in a large bowl. Take the cold butter from the freezer and toss it with the flour mixture.

3. Dump the cold butter cubes and flour mixture onto a large work area for rolling. With a rolling pin, roll the mixture, flattening the butter cubes with the flour into long, thin, floured butter sheets. Work quickly to ensure that the butter stays cold. Below is what the rolled butter and flour look like after I’

ve gathered them together on the work surface a bit.

4. Place the flour and flattened butter back in the large bowl and chill for 10 minutes. When the butter is cold, remove the bowl from the refrigerator, make a small well in the center of the flour and butter mixture. Add the cold buttermilk to the bowl all at once. Begin to bring the dough together with one hand ( keep the other hand free to answer the phone). Moisten all of the flour with the milk, using your hand to break up large clumps of milk and flour. The dough will be rather shaggy, but you can add another tablespoon of buttermilk, if you see that all your flour isn’t moistened. Form the dough into two disks. The disks will be rough, and hard to shape together, but once they rest in the fridge for an hour, they’

ll be easier to roll out.

5. Chill the dough for at least an hour in the refrigerator. At this point, the dough will keep in the fridge for up to three days, or in the freezer for up to three weeks. For freezing, roll the dough out into sheets and wrap them in plastic film.

6. Roll out the top crust large enough to cut a 12-inch circle.

Transfer the pie filling mixture to the pie shell. Moisten the border of the bottom crust by brushing it lightly with water and place the top crust over the filling. Trim the overhang of the top crust so that there is only 1/2-inch of overhand. Tuck the overhand under the bottom crust boarder and press down all around to seal it. Crimp the border using a fork or your fingers and make about 5 evenly spaced 2-inch slashes starting about 1 inch from the center of the pie and radiating toward the edge. Cover the pie loosely with plastic wrap and refrigerate it for 1 hour before baking. This will chill and relax the pastry, preventing shrinking.

Posted by Picasa

Fresh Blackberry Pie

Look at those beautiful blackberries!!! (The fresh lemon zest played a big part in the heavenly flavor!) Our little family went blackberry picking recently- we came home quite scraped and slivered, but what a prize! After these beautiful pies, I decided it was well worth the battle. :) You have to use the amazing Buttermilk Pie Crust recipe to go with it- SO GOOD! I will eat this pie any day... and grow very fat and happy!

Blueberry Pie (Or Blackberry in this case :)

From Annie's Eats


Ingredients:

2 rolled-out rounds basic pie dough

4 cups blueberries

1 tbsp. fresh lemon juice

¾ cup sugar

3 tbsp. cornstarch

½ tsp. finely grated lemon zest

¼ tsp. salt

¼ tsp. cinnamon

1 tbsp. cold unsalted butter, cut into pieces

1 egg

1 tbsp. water


Directions:

Line the bottom of a 9-inch pie pan with one of the rolled-out dough rounds. Set pan aside in a cool place until ready to fill.


To make the filling, place the blueberries in a large bowl, sprinkle with the lemon juice and toss to coat evenly. In a small bowl, stir together the sugar, cornstarch, lemon zest, salt and cinnamon. Sprinkle the sugar mixture over the berries and toss to distribute evenly. Immediately transfer to the dough-lined pan. Dot with butter pieces. Place the remaining dough round on top of the pie and trim the excess from the bottom and top rounds. Crimp the dough rounds together to seal the edges. Be sure to cut vents in the top crust to allow steam to escape during baking.


Refrigerate the pie until the dough is firm, 20-30 minutes. Position a rack in the lower third of the oven and preheat to 375°. In a small bowl beat the egg and water with a fork to make an egg wash. Brush onto the top crust just before baking.


Bake the pie until the crust is golden and the filling is thick and bubbling, 50-60 minutes. Transfer to a wire rack and let cool completely to set, 1 to 2 hours. Serve at room temperature or rewarm in a 350° oven for 10 to 15 minutes just before serving.


Note: If fresh blueberries are unavailable, use frozen blueberries (without thawing) and increase the baking time by 10-15 minutes.

Posted by Picasa

Monday, August 9, 2010

Chocolate Pudding in a Chocolate Graham Cracker Crust


I was having a chocolate craving of late, and this is what I prescribed myself. :) The pudding was super rich and yummy, but it certainly didn't set up as the firm pie I was intending (even after refrigeration) and the graham cracker crust certainly did not hold it's pie crust shape. However, I did end up with a heavenly "BLOB" of chocolate goodness, so I am not complaining. Moral of the Story: don't force pudding to become a pie when it just doesn't feel like being a pie. Enjoy rich chocolate pudding for puddings sake. :)

Chocolate Graham Cracker Crust (piechef.com)

1 1/2 cups chocolate graham cracker crumbs (about 10-12 whole crackers)
4-6 TB melted butter

Preheat oven to 350 degrees.

Prepare graham cracker crumbs by one of two methods:

• Coarsely break crackers and place in the food processor. Process with metal blade until finely pulverized.

• Place crackers in a plastic bag and crush them with a rolling pin.

Add melted butter and combine. This will require a few pulses in the food processor or a few seconds mixing by hand in a bowl.

Press the crumbs into a 9 inch pie pan, spreading them evenly over the bottom and sides.

Bake for about 8-10 minutes.

Quick & Easy Homemade Chocolate Pudding (By Loren's Gem on HubPages)

Ingredients

  • 2 1/2 cups whole milk
  • 1/2 cup granulated white sugar
  • 1/3 cup unsweetened cocoa powder
  • 1/3 teaspoon fine salt
  • 2 tablespoons cornstarch
  • 1 tablespoon unsalted butter (room temperature)
  • 1 teaspoon pure vanilla extract
  • 1 whole egg

For topping:

  • whipping cream
  • grated chocolate

Directions

  1. Whisk the 2 ½ cups of milk with the whole egg, white sugar, salt, cornstarch and unsweetened cocoa powder in a small mixing bowl.
  2. In a saucepan, bring all the blended ingredients to a simmer over medium-high heat.
  3. In another mixing bowl, whisk together the cornstarch, butter, and vanilla extract and add to the simmering milk mixture. Reduce the temperature to medium-low heat.
  4. Whisk constantly until the pudding comes to a full boil.
  5. As soon as the mixture starts to thicken, lower the heat (just enough to continue simmering) and continue whisking for about 2-3 minutes or until it becomes really thick.
  6. Make sure you’ll reach the bottom and sides of the saucepan when whisking so as to prevent the pudding from sticking. As you cook, it may look lumpy but as you whisk quickly and stir constantly, the lumps will just be smoothed out perfectly well.
  7. Remove saucepan from the heat.
  8. With the help of a rubber spatula, pour the warm chocolate pudding into small separate bowls.

Note:

  • If you want to eat your chocolate pudding warm, you may serve it immediately. Though if you prefer to serve them chilled, then you will need to cover the small bowls of chocolate pudding individually with a plastic wrap. This will help prevent a skin layer on top of the puddings from forming.
  • You may leave the puddings refrigerated for about 4-6 hours before serving. You may also leave them chilled on your refrigerator overnight until set and your puddings will taste even better.
  • Ideally, chocolate puddings are best served chilled and with a dallop of softly-whipped cream on top.
Posted by Picasa

Wednesday, April 14, 2010

Cherry Triangles

This last Valentines day, my good friend Afton and her husband popped in with these delicious Cherry Triangles to wish us a happy day! (She said they are a tradition at her house for V-day! :) I thought it was so sweet and they were quite scrumptious! I finally got the recipe (2 months later :)- which is quite labor intensive, but when I talked to Afton, she said she likes to take some short cuts (my kind of gal! :). She likes to use canned cherry pie filling and the store bought roll out pastry pie crusts. (That would save a ton of time!) I'm sure the taste is a bit different- and looking over the recipe, I bet this would be SUPER GOOD! But if you are in a hurry, take her short cuts and you'll still end up with something delicious! :)

Cherry Triangles
(From Afton Richards)
Filling:
3/4 cup sugar
5 T cornstarch
1/4 tsp salt
1 quart called pie cherries in juice or 2 no. 303 cans water-packed tart red cherries
1 cup reserved cherry juice
1 T butter
2 tsp lemon juice
a couple drops of red food coloring

Mix sugar, cornstarch, and salt in saucepan. Add cherry juice and cook, stirring constantly until thickened. Stir in butter, lemon juice, cherries and red food coloring. Cool.

Crust:
2/3 cup milk, scalded
1 pkg. yeast
1 cup butter, softened
2 1/2 cup flour 4 egg yolks, beaten

Cool milk to luke-warm; add yeast. Cut butter into flour. Add liquid ingredients and egg yolks to dry ingredients. Mix thoroughly. Turn out onto floured surface and knead about 10 times. Divide dough enough to cover surface of an ungreased 11 1/2 x 17 1/2 jelly roll pan. Spread cooled cherry sauce over dough. Roll out second portion of dough and fit over dough and cherry sauce in pan. Pinch edges of the two layers of dough together gently. Allow dough to rise in warm place for about 15 minutes. Bake at 350 for 45 to 55 minutes. Cool.

Frosting:
1/4 cup butter
1/2 tsp vanilla
2 cream
1 1/2 cup powdered sugar

Cream together butter, vanilla and sugar. Add powdered sugar, beating until mixture is blended. Spread frosting over partially cooled pastry. Sprinkle with chopped nits or maraschino cherries. When cool, cut into 3 inch squares, then cut each square diagonally into triangles. Makes 48.
Posted by Picasa