Sunday, February 27, 2011

Daring Baker's Challenge: Panna Cotta & Nestle Florentine Cookies

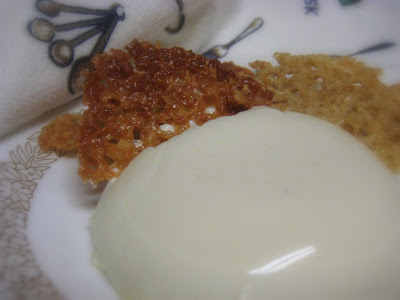
The February 2011 Daring Bakers’ challenge was hosted by Mallory from A Sofa in the Kitchen. She chose to challenge everyone to make Panna Cotta from a Giada De Laurentiis recipe and Nestle Florentine Cookies.I LOVE ALL THINGS CREAMY... and this yummy dessert makes the list! This was fairly simple to create, but something about it makes you feel fancy... and something about that creamy texture is just heaven to me. I think this was one of my favorite challenges so far! I'll be making this again... after I loose a bit of weight from this go around. :)

Giada's Vanilla Panna Cotta

Ingredients
1 cup (240 ml) whole milk
1 tablespoon (one packet) (15 ml) (7 gm) (¼ oz) unflavored powdered gelatin
3 cups (720 ml) whipping cream (30+% butterfat)
1/3 cup (80 ml) honey
1 tablespoon (15 ml) (15 gm) (½ oz) granulated sugar
pinch of salt

Directions:

  1. Pour the milk into a bowl or pot and sprinkle gelatin evenly and thinly over the milk (make sure the bowl/pot is cold by placing the bowl/pot in the refrigerator for a few minutes before you start making the Panna Cotta). Let stand for 5 minutes to soften the gelatin.
  2. Pour the milk into the saucepan/pot and place over medium heat on the stove. Heat this mixture until it is hot, but not boiling, about five minutes. (I whisk it a few times at this stage).
  3. Next, add the cream, honey, sugar, and pinch of salt. Making sure the mixture doesn't boil, continue to heat and stir occasionally until the sugar and honey have dissolved 5-7 minutes.
  4. Remove from heat, allow it to sit for a few minutes to cool slightly. Then pour into the glass or ramekin.
  5. Refrigerate at least 6 hours or overnight. Add garnishes and serve.
(*My daughter sees me taking "food" pictures, and she said she needed a turn. :) She felt like a face with a beard would be "artistic".)

Nestle Florentine Cookies

Recipe from the cookbook “Nestle Classic Recipes”, and their website.

Ingredients:
2/3 cup (160 ml) (150 gm) (5.3 oz) unsalted butter
2 cups (480 ml) (160 gm) (5 2/3 oz) quick oats
1 cup (240 ml) (230 gm) (8 oz) granulated sugar
2/3 cup (160 ml) (95 gm) (3⅓ oz) plain (all purpose) flour
1/4 cup (60 ml) dark corn syrup
1/4 cup (60 ml) whole milk
1 tsp (5 ml) vanilla extract
pinch of salt
1½ cups (360 ml) (250 gm) (9 oz) dark or milk chocolate

Directions:
Preheat oven to moderately hot 375°F (190°C) (gas mark 5). Prepare your baking sheet with silpat or parchment paper.

  1. Melt butter in a medium saucepan, then remove from the heat. (Rather then do this over the stove, I just melted the butter in a big glass bowl in the microwave... I think it was quicker and worked fine.)
  2. To the melted butter add oats, sugar, flour, corn syrup, milk, vanilla, and salt. Mix well. Drop a tablespoon full, three inches (75 mm) apart, onto your prepared baking sheet. Flatten slightly with the back of your tablespoon, or use a spatula. (No matter how far apart I spread my cookies, I still ended up with a "sheet" of cookie, rather then individuals... not sure what I did, but they still tasted good, I just broke them apart.)
  3. Bake in preheated oven for 6-8 minutes, until cookies are golden brown. Cool completely on the baking sheets.
  4. While the cookies are cooling melt your chocolate until smooth either in the microwave (1 1/2 minutes), or stovetop (in a double boiler, or a bowl that fits atop a saucepan filled with a bit of water, being sure the water doesn't touch the bottom of the bowl). (Or just use Netella like me... who doesn't love an excuse to use Netella. :)
  5. Peel the cookies from the silpat or parchment and place face down on a wire rack set over a sheet of wax/parchment paper (to keep counters clean).
  6. Spread a tablespoon of chocolate on the bottom/flat side of your cookie, sandwiching another (flat end) cookie atop the chocolate.

This recipe will make about 2 1/2 - 3 dozen sandwiched Florentine cookies. You can also choose not to sandwich yours, in which case, drizzle the tops with chocolate (over your wax paper).

Thursday, February 24, 2011

Freezer Meals: This one goes out to Michelle...

A while back, my friend Michelle posted a comment/questions/request, and I just wanted her to know that I had not forgotten about her! Here is what she wrote:

Hey Lydia,
I love your site because you have actually made the meal and you add your own twist to things, or alternatives you think would make it taste better! I was wondering if you have any recommendations for "make ahead" meals? You know, ones you freeze and use another time? I am thinking of trying some of those out for busy times. Do you have any good recipes to recommend? Or have you tried out any that you have liked? Thanks!
-Michelle

Michelle,
If you only knew how very much I am wishing for a freezer (Even a small one!) and dreaming of actually having freezer space to make something like that happen! I've just got an itty-bitty freezer and I'm lucky to squeeze in a bit of frozen fruit, some meat, and an occasional bag of unhealthy, but delicious tater-tots. :) So actually stuffing in a frozen casserole or the like, does not happen very often, and when it does, it somehow gets buried in the frozen abyss almost never to be discovered again, until it is too late. HOWEVER, when I was almost due with my last little guy, my sweet friends threw me a "Practical Baby Shower" (Here I go again with the baby-shower recipes :) and some of the girls helped cook and assemble some nice freezer meals for me- it was a huge help after the baby came! (Space was a bit of an issue then too, because I remember having to leave some in her freezer and she brought them to me later.)

They made Stuffed Jumbo Shells, Orange Chicken, Mini Cheddar Meat Loaves (One of my favorites!), and Herbed Chicken for me. All of these recipes freeze up really well and they used those disposable aluminum Dollar Store containers which stack up really nicely, but I think I would prefer zip-lock bags because I would rather microwave to heat them up- the oven takes to long for my impatient self. :) Most of them took about 30-40 minutes to heat through and I feel like I could make a meal in that time- but if you are thinking ahead and just remember to pop it in the oven, it works fine.

All these meals are all relatively easy to make, too and the whole family loved them! I should get in touch with my friend that threw me the shower, because she was always making freezer meals- a big batch at a time and then tucking it away. I know casseroles work really well- you just kind of make double and freeze one, and it isn't as much trouble.

I have made the Orange Chicken, but I think I forgot to post it, so I'll get around to posting that one soon. I recently made the Herb Chicken- it makes a great Sunday meal! It doesn't take too long to make and it's really tasty! Anyway- best of luck with your endeavors and please share with me what you discover works well! I know you've got some good ones up your sleeve! Glad you are keeping track of me! I miss sweet friends like you!
-Lyd

Herb Chicken
6 boneless, skinless, chicken breasts
3/4 cup butter, melted (I think 1/2 cup or one cube would be plenty.)
1 cup grated Parmesan cheese
2 cloves garlic, minced
1/4 cup freshly chopped parsley
1 cup herb seasoned stuffing mix
1/4 tsp. dried sage
1/4 tsp dried thyme

Rinse chicken breasts and pat with pepper towels to remove moisture. In a small bowl combine all ingredients except chicken. Stir together until well blended. Place each chicken breast in herb mixture and coat on both sides. Place on greased baking sheet and cook at 325 for about 45 minutes. Makes 6 or more servings.
Posted by Picasa

Tuesday, February 22, 2011

Mandrin Orange Salad


My mother-in-law whipped up this great side dish when we visited a while back. I thought it was pretty tasty! I wasn't very patient, it should have had more time to set, but I couldn't wait for the orange yumminess. :)

Mandrin Orange Salad (Maxine Stewart)
1 small pkg. vanilla pudding (not instant)
1 small pkg. orange jello
2 cups water
*Stir ingredients together, bring to a boil, and remove from heat.

1 can mandrine oranges with juice
1 cup whipped whipping cream (or cool whip)
*Add ingredients to jello mixture. Stir thoroughly and set in refrigerator. Before serving, sprinkle with crumbled gram crackers on top or add mini marshmallows.
Posted by Picasa

Saturday, February 19, 2011

Never Underestimate the Power of 4-H... whence came My Microwaved Egg McMuffin


I am a proud previous 4H'er. However, while my friends were shearing sheep and raising up baby pigs, I was taking "Microwave Cooking." No... I'm not making that up, there really was a microwave cooking class. (Which I completely loved, by the way, so keep your thoughts to yourself. :) I don't remember all the "nuked" goodness I produced, but there was one in particular that stuck with me... and aren't you lucky, because I'm going to share it with you. :) This was what I had for breakfast pretty much EVERY DAY during my college experience. It was quick, easy and delicious, and made all my room-mates jelous. But it has been quite a while, and the other morning, I remembered my little microwaved gem... never to forget again! :)

*I'm going to give a recipe for 1 serving, but you can crank as many out as you please. :) This is a really handy technique if you are just making 1 or 2, but if you are mass producing, you might just want to scramble up some eggs, unless you have several microwaves handy. :)

Microwaved Egg McMuffin
1 English muffin or prepared biscuit (I like to use whole wheat English muffins)
1-2 eggs
A little mayo and mustard
1 big slice of cheese
ham, bacon, or sausage patties

Cook meat of choice and have other ingredients ready for fast assembly. Spread mayo and mustard on toasted English muffin.

Spray a hot chocolate/coffee mug with pam-spray to lightly coat the bottom and sides. Crack 1-2 eggs in and stir well with a fork until yoke is ruptured (Am I allowed to use that word with regards to cooking?) and incorporated. Microwave for 1 minute if you are doing 2 eggs and about 40 seconds if you are making one (but they cook fast, so watch it close and don't let it explode. :) Let it cool for a second and use a spoon to loosen the edges.

Place cooked egg on a toasted English muffin with cheese and meat. I like to microwave for another 20-30 seconds to melt cheese and make sure it's hot. Enjoy your EASY, YUMMY breakfast!
Posted by Picasa

Wednesday, February 16, 2011

Happy "Late" Valentine's Day!!!

Gone are the days of home-made valentines, decorated Kleenex mailboxes, and "Do you love your neighbor?"... I had to really talk my daughter's teacher into letting me bring cupcakes. They have a strict no candy policy and they don't celebrate holidays. Rip off!!! I looked forward to those days all year!!! I'm glad we did the cupcakes because Amberlee was on cloud nine passing them out. She was so tickled with herself. I think she got 2 other little Valentine notes from classmates, and she came skipping out of the school saying "Valentines is my favorite, best day ever!!!" Oh little Amberlee... if only you knew what it could be. :) Hope you had a very "SWEET" day!!!
Posted by Picasa

Fruit Cobbler


This is a LONG AWAITED recipe. My friend brought this to a baby shower... one bite and I had to have the recipe! Despite what you may think, I do have a life beyond baby showers... it just seems to be a good place to get "winning" recipes. This is definitely one of those! I thought it was delicious- I love fruity deserts and this is a GOOD ONE! Thanks Jackie!

Fruit Cobbler (From Jackie Stafford)
Filling:
4 cup fruit
1 cup sugar
1 tsp. cinnamon
2 tbsp. cornstarch

Bring to a boil and cook one minute, or till thickened.

Batter:
In a separate bowl, mix:
1.5 tsp baking powder
2 cups flour
1.5 cups sugar
1.5 cups milk

Melt: 1 cube butter in a large cake pan. (350 degrees)
Pour batter over melted butter in cake pan, and then pour fruit filling on top and bake until golden brown 350 degrees 30-40 minutes.

Serve with ice cream or whipped cream.
Posted by Picasa

Monday, February 14, 2011

Daring Cook's Challenge: Cold Soba Salad & Tempura


The February 2011 Daring Cooks’ challenge was hosted by Lisa of Blueberry Girl. She challenged Daring Cooks to make Hiyashi Soba and Tempura. She has various sources for her challenge including japanesefood.about.com, pinkbites.com, and itsybitsyfoodies.com

Might I add that my own dear husband was thrilled about this challenge. He served an LDS mission in Japan for two years, so any time I attempt to make Asian food, he's a happy man. :) I have made tempura before, but I have always used a package mix, so it was fun trying to make the mixture from scratch. The batter consistency was thinner and different then I have had it turn out in the past, however, I thought the vegetables were delicious! I think part of my mistake was trying to add too many veggies to too little mixture, but it was still great. I'll just be sure to make more next time.

*Teryaki Chicken: I also made a yummy teryaki chicken to go with it by slicing 1-2 chicken breasts into strips, heating about a tablespoon of oil in a pan and pouring about 1/4 cup of teryaki sauce over it. Stir and make sure both sides are cooked through and the sauce reduces down and almost caramelizes. Serve with veggies.

Tempura Batter
1 egg yolk from a large egg
1 cup (240 ml) iced water
½ cup (120 ml) (70 gm) (2½ oz) plain (all purpose) flour, plus extra for dredging
½ cup (120 ml) (70 gm) (2½ oz) cornflour (also called cornstarch)
½ teaspoon (2½ ml) (2½ gm) (0.09 oz) baking powder
oil, for deep frying preferably vegetable
ice water bath, for the tempura batter (a larger bowl than what will be used for the tempura should be used. Fill the large bowl with ice and some water, set aside)

Very cold vegetables and seafood of your choice ie:

  • I chose the use broccoli, zucchini (which is especially good!), and mushrooms. I wanted to do asparagus and carrots, but didn't have time.
  • Sweet potato, peeled, thinly sliced, blanched
  • Carrot, peeled, thinly sliced diagonally
  • Pumpkin, peeled, seeds removed, thinly sliced blanched
  • Green beans, trimmed
  • Green bell pepper/capsicum, seeds removed, cut into 2cm (¾ inch)-wide strips
  • Assorted fresh mushrooms
  • Eggplant cut into strips (traditionally it’s fanned)
  • Onions sliced

Directions:

  1. Place the iced water into a mixing bowl. Lightly beat the egg yolk and gradually pour into the iced water, stirring (preferably with chopsticks) and blending well. Add flours and baking powder all at once, stroke a few times with chopsticks until the ingredients are loosely combined. The batter should be runny and lumpy. Place the bowl of batter in an ice water bath to keep it cold while you are frying the tempura. The batter as well as the vegetables and seafood have to be very cold. The temperature shock between the hot oil and the cold veggies help create a crispy tempura.
  2. Heat the oil in a large pan or a wok. For vegetables, the oil should be 320°F/160°C; for seafood it should be 340°F/170°C. It is more difficult to maintain a steady temperature and produce consistent tempura if you don’t have a thermometer, but it can be done. You can test the oil by dropping a piece of batter into the hot oil. If it sinks a little bit and then immediately rises to the top, the oil is ready.
  3. Start with the vegetables, such as sweet potatoes, that won’t leave a strong odor in the oil. Dip them in a shallow bowl of flour to lightly coat them and then dip them into the batter. Slide them into the hot oil, deep frying only a couple of pieces at a time so that the temperature of the oil does not drop.
  4. Place finished tempura pieces on a wire rack so that excess oil can drip off. Continue frying the other items, frequently scooping out any bits of batter to keep the oil clean and prevent the oil (and the remaining tempura) from getting a burned flavor.
  5. Serve immediately for the best flavor, but they can also be eaten cold.

Soba Noodles:

Ingredients
2 quarts (2 Liters) water + 1 cup cold water, separate
12 oz (340 g) dried soba (buckwheat) noodles (or any Asian thin noodle)

Directions:

Cooking the noodles:

  1. Heat 2 quarts of water to a boil in a large pot over high heat. Add the noodles a small bundle at a time, stirring gently to separate. When the water returns to a full boil, add 1 cup of cold water. Repeat this twice. When the water returns to a full boil, check the noodles for doneness. You want to cook them until they are firm-tender. Do not overcook them.
  2. Drain the noodles in a colander and rinse well under cold running water until the noodles are cool. This not only stops the cooking process, but also removes the starch from the noodles. This is an essential part of soba noodle making. Once the noodles are cool, drain them and cover them with a damp kitchen towel and set them aside allowing them to cool completely.
Posted by Picasa

Saturday, February 12, 2011

Deeply Chocolate Gelato

My mom and dad combined forces to made this AMAZING Italian Ice-cream... so rich and yummy. (Mom made the mixture and dad runs the ice-cream maker. :) It reminded me a frozen rich chocolate pudding or a Wendy's Frosty times ten! Really yummy!!! Mom said she had it first at my sis-in-law Chelsea's and she just thought it was heavenly. I'm glad I got a good sample, too! It's not every day that chocolate freezes into something this good. :)

Deeply Chocolate Gelato (Ina Garten)
2 1/4 cups whole milk
1/3 cup heavy cream
3/4 cup sugar, divided
1 cup unsweetened cocoa powder (recommended: Pernigotti)
2 ounces bittersweet chocolate, finely chopped
4 extra-large egg yolks
2 tablespoons Mexican coffee flavor liqueur (recommended: Kahlua)
2 teaspoons pure vanilla extract
Large pinch kosher salt
8 chocolates, roughly chopped, optional (recommended: Baci)

Heat the milk, cream, and 1/2 cup sugar in a 2-quart saucepan, until the sugar dissolves and the milk starts to simmer. Add the cocoa powder and chocolate and whisk until smooth. Pour into a heat-proof measuring cup.
Place the egg yolks and the remaining 1/4 cup sugar in the bowl of an electric mixer fitted with the paddle attachment and beat on high speed for 3 to 5 minutes, until light yellow and very thick. With the mixer on low speed, slowly pour the hot chocolate mixture into the egg mixture. Pour the egg and chocolate mixture back into the 2-quart saucepan and cook over medium-low heat, stirring constantly, until thickened. A candy thermometer will register about 180 degrees F. Don't allow the mixture to boil!
Pour the mixture through a sieve into a bowl and stir in the coffee liqueur, vanilla, and salt. Place a piece of plastic wrap directly on top of the custard and chill completely.
Pour the custard into the bowl of an ice cream maker and process according to the manufacturer's directions. Stir in the roughly chopped chocolate, if using, and freeze in covered containers. Allow the gelato to thaw slightly before serving.
Posted by Picasa

Tuesday, February 8, 2011

Peanut Butter Cookie Dough Balls

My friend Melissa shared some of these yummy cookies balls with us. My girls actually got a sample a while back from her husband, our manager. I was busy paying rent, and when we were at the office window, he shared a couple cookies with them. Now, they beg me to take them to the office for cookies... they think it's like the dum-dums or Fruities at the bank. I'm not sure how to break this trend, but now that I have the yummy recipe, I can just pack down my own cookies or they can get their "fix" beforehand. :) ...And I can too, of course. :)

Peanut Butter Cookie Dough Balls
(I got this from Melissa, who found it on Peasandthankyou.com, and she was inspired by Annie the Baker’s Cookie Dough Balls, just to give credit where credit is due. :)
Makes 12-18 dough balls
1/2 c. non-dairy margarine (i.e. Earth Balance)
3/4 c. natural peanut butter
1/2 c. organic brown sugar
3/4 c. organic powdered sugar
1/2 t. vanilla extract
1 t. baking powder
1/2 t. baking soda
3/4 t. salt
1 c. whole wheat pastry flour
1/2 c. unbleached organic flour
1/2 c. natural peanut butter chips
1/2 c. non-dairy chocolate chips

Using a stand mixer, beat margarine, peanut butter, sugars and vanilla until fully incorporated.
In a separate bowl, combine baking powder, baking soda, salt and flours.
Add dry mixture to the mixer bowl a little at a time.
Mix until a dough forms.
Add your chips. There’s no need for exact measurements here. I won’t tell.
Combine and chill dough for 30 minutes.
***Edited to add: your dough may seem a little dry based on the type of peanut butter used (I used Skippy natural). If you cannot get it to come together by mixing or packing it into your scoop tightly, you can try adding an additional tablespoon of peanut butter or non-dairy milk.

You could just eat the dough at this point, then click on the “Contact Me” button and propose marriage. If you want the full Cookie Dough Ball experience though, preheat your oven to 350 degrees. Scoop dough with a mini ice cream scoop (or your fingers) and place balls on a cookie sheet.

Bake for 10-12 minutes. They’ll still be soft and look much like they did going in, but don’t overbake. Let the dough balls rest on the pan for a minute before transferring to a cooling rack.
Posted by Picasa

Sunday, February 6, 2011

Chicken Pot Pie with Whole Wheat Pie Crust

I FORGOT THE CHICKEN! Honestly- take the chicken out and all you have is "pot pie" and how tempting does that sound? I couldn't believe I forgot it! It was a long day though... I was just happy to put the top on and pop it in the oven... and it was at that moment that I realized I was missing a "key" ingredient. Despite my "forgetfulness", it tasted grand... happy news for the vegetarian. A yummy pie with or without the chicken. :) I just made a regular pie crust and subbed white for wheat, but admittedly, the crust wasn't amazing. It was a little dry and crumbly- I had to add more water to get it to hold together at all... I think I just needed to find a good whole wheat recipe. Still good though.

Chicken Pot Pie (Betty Crocker)
1 package (10 oz) frozen peas and carrots (I peeled and thinly sliced potatoes, carrots, celery, and added some frozen peas instead if the frozen package.)
1/3 cup butter
1/3 cup flour
1/3 cup chopped onion (Give me a break... do people really just chop up 1/3 cup and "reserve" the rest? Do a whole onion, I would sleep better if you did!)
1/2 tsp salt
1/2 tsp pepper
1 3/4 cup chicken broth
2/3 cup milk
2 1/2 to 3 cups cut-up cooked chicken or turkey (You almost forgot too, didn't you? :)
Pastry for 9-inch Two-Crust Pie

1. Rinse frozen peas and carrots in cold water to separate; drain. (Or cut up all those veggies I mentioned above.)
2. Melt butter in 2-quart saucepan over medium heat. Stir in flour, onion, salt, and pepper (and all the veggies if you do it that way.) Cook, stirring constantly, until mixture is bubbly; remove from heat. Stir in broth and milk. Heat to boiling, stirring constantly. Boil and stir 1 minute, Stir in chicken (yes chicken!) and peas and carrots; remove from heat.
3. Heat oven to 425.
4. Make pastry. Roll two-thirds of the pasty unto 13-inch squares. Ease unto ungreased square pan (9x9x2 inches) (I just did mine in a pie dish and I doubled the recipe so I would have two pies.) Pour chicken mixture into pastry lined pan.
5. Roll remaining pastry 11 inch square. Cut out designs with 1 inch cookie cutter. Place square over chicken mixture. Arrange cutouts on pastry. Turn edges of pastry under and flute.
6. Bake about 35 minutes or until golden brown.
Posted by Picasa

Friday, February 4, 2011

Fruity Homemade Ice Cream

My friend made this ice cream A LONG while back at a baby shower... but even with the passage of time, I have not forgotten it's goodness. I have wanted an ice cream maker ever since, just so I could make it. Then my sis-in-law started posting all these incredible ice cream recipes and I wanted one even more, and she and my brother made my dreams come true this last Christmas when they bought me an ice cream maker!!! This was the first recipe I decided to try out and it was quite heavenly. (The kids were TOTALLY entertained watching the whole "spinning" process.) I still have some quirks to work out with the maker, but it was absolutely delicious! Start wishing for one so you can make it... maybe next year for Christmas you will get it... but only if you are really good! :)

Fruity Homemade Ice Cream (From Leslie Rogers)
**This recipe is for a six quart sized ice cream maker. If you have a smaller one just half everything- I halved it and it was great.

1 quart whipping cream
4 cups sugar
1 pkg. frozen raspberries (I used some of my fresh frozen blackberries.)
(12 oz.)1 pkg. sliced sweetened frozen strawberries (I substituted blueberries- didn't it make it so pretty!)
1 large can (20 oz.) crushed pineapple
4 bananas chopped
1/2 cup orange juice concentrate
1/4 cup lemon juice

Place all ingredients in big bowl and stir till combined. Dump into ice cream maker cylinder. Add milk to the fill line, leaving1 ½ in. from the top. (Make according to your ice cream maker instructions. If yours uses ice and rock salt, I usually use either 1 1/2 bags of ice, or get a really big bag.) Enjoy!!!
Posted by Picasa

Tuesday, February 1, 2011

Eggplant Lasagna

Well, I got brave again and purchase another eggplant... it is just such a foreign food for me, but so lovely and smooth and purple, that it tempts me, and I buy it... and I'm usually quite baffled to know what to do with it. However, this time, I remembered my mom mentioning that she and my Grandma had made a lasagna with one that was really good and supposedly very low in calories... going right a long with everyone's new years resolutions, right? :) So I found a recipe (from Foodnetwork.com) and thought I would give it a try. It turned out pretty good. Eggplant just has a weird flavor and texture to me that I just can't quite get past, but Doug really liked it, and the kids actually did pretty good on theirs too... enough sauce and cheese to carry you through. :) I thought it was smart to pre-cook the eggplant because I don't think it would get cooked through otherwise.

Danny Boome's Eggplant Lasagna
  • 2 large eggplants, sliced lengthwise 3/4-inch thick (8 slices)
  • 5 tablespoons olive oil, divided plus more for baking dish
  • Coarse salt and freshly ground black pepper
  • 1 cup thinly sliced cremini mushrooms
  • 2 garlic cloves, minced
  • 1 tablespoon freshly chopped thyme leaves
  • 1 (15-ounce) container whole milk ricotta cheese (I used a container of cottage cheese for lack of ricotta. :)
  • 3 large eggs
  • 1 cup grated Parmesan, divided
  • 2 tablespoons freshly chopped oregano leaves
  • 2 cups Nona's Marinara Sauce (I was in a hurry and used the spaghetti sauce from a can... FOR SHAME, but this looked like a good recipe.)

Preheat oven to 400 degrees F.

Arrange sliced eggplant in a single layer on 2 sheet pans. Brush on both sides using 3 tablespoons of oil and season with salt and pepper. Roast the eggplant until it is soft and golden. Turn slices halfway through, about 25 minutes.

Meanwhile, in a medium skillet add the remaining 2 tablespoons of oil and the sliced mushrooms. Saute until soft for about 7 minutes. Add the minced garlic and chopped thyme. Cook for another 2 minutes. Once the mushrooms are cooked remo

ve and set aside to cool.

In a large bowl add the ricotta, eggs, 1/2 cup Parmesan, oregano, mushrooms, 2 teaspoons of salt and 1/4 teaspoon pepper. Mix well. Brush an 8-inch baking dish with oil.

Spread half of the marinara sauce on the bottom of the prepared baking dish. Lay 4 slices on top followed by the ricotta mixture. Lay another 4 slices of eggplant and finish with marinara sauce. Top with the remaining 1/2 cup Parmesan. Bake until golden brown, at 350 degrees, for 30 minutes.

Posted by Picasa