Monday, May 13, 2013

Caramel Chocolate Surprise Bars


Here is one that is sure to impress, and nobody need know how easy it was to make!  I like "101 More Things to do with a Cake Mix" for that reason.  Super easy when you need to throw something together.  All these ingredients work well together and it taste great served warm with a scoop of ice cream... trust me, I would know. :)  Definitely a big dose of sugar for the day, though, so watch out!

Caramel Chocolate Surprise Bars
1 yellow cake mix
1/2 cup butter, melted
1/4 cup evaporated milk
1 cup chocolate chips
3/4 cup chopped nuts
1 jar (12 oz) caramel ice cream topping

Preheat oven to 350.  With a spoon, mix cake mix, butter, and evaporated milk together.  Spread 3/4 of dough evenly into a greased 9x13 pan. Spread chocolate chips and nuts over the top, evenly.  Break rest of dough into small pieces and drop[ evenly over top.  Bake 20-25 minutes.  Cool 30 minutes.  Cut into bars.  Store in refrigerator.
Posted by Picasa

Friday, April 26, 2013

Easy Crockpot Lasagna


Oh... my poor cooking blog has suffered greatly with my recent move.  Life just got kind of crazy with all the packing and very little cooking going on... at least not anything blog-worthy... plenty of fish sticks, pancakes, and frozen pizzas.  However, I just got the kitchen unpacked today, and I felt it would be appropriate to hop back in the saddle with the christening of my new kitchen.
How and why have I never tried this?  It was like it has never occurred to me to bake the lasagna in the crockpot.  BRILLIANT.  So tasty and perfect consistency... oh, and did I mention you don't even have to cook the noodles?  That tipped the scales for me.  Don't know if I can ever go back now.

*Lyd's Tip:  It is probably a good idea to spray the sided with cooking spray so it doesn't stick, but for the bottom, I just started with a little bit of the sauce mixture spread over the bottom and then start layering, and I had no problem with sticking.


Easy Crockpot Lasagna
1 pound (16 ounces) ground beef
1/2 cup diced white onion
1 teaspoon minced garlic
1 (24 ounce) jar spaghetti sauce
1/2 cup water
1 (15 ounce) container ricotta cheese
2 cups mozzarella cheese
1/4 cup grated Parmesan cheese
1 whole egg
2 Tablespoons fresh parsley or 2 teaspoons dried parsley
6 uncooked lasagna noodles

In a large skillet brown beef and onion. Add garlic and cook for one minute. Drain.
Add spaghetti sauce and water and simmer for about 5 minutes.
Mix ricotta, 1 1/2 cups mozzarella, 2 Tablespoons Parmesan, egg and parsley.
Pour 1 cup of spaghetti meat sauce into a 4 to 6 quart sized slow cooker. Place half of the noodles and half of the ricotta mixture on top of the sauce. Cover with 2 cups meat sauce. Top with remaining noodles (If the noodles don't fit exactly break them to fit) and cheese mixture and meat sauce.
Cook on low for 4 to 5 hours or until noodles are soft. Sprinkle with 1/2 cup of mozzarella and remaining parmesan. Cover with the lid to melt the cheese and let it sit for 10 minutes before serving.
Do not overcook and don't try to speed up the process by cooking it on high.
*Works best with a 4 to 6 quart size slow cooker.
(From: tablespoon.com)
Posted by Picasa

Sunday, March 31, 2013

Crispy Easter Nests


First of all: Forgive my absence... I am in the middle of moving and things have been pretty crazy around here!
Second of all...
HAPPY EASTER!!!
Aren't these fun!  We had such an awesome Easter Egg Hunt yesterday and my friend brought these cute treats.  They were a big hit with kids and grown-ups. :)

Crispy Easter Nests
1 (14 oz.) bag sweetened flake coconut
Green food dye
1 (7.5 oz.) jar Marshmallow Fluff
3 cups Rice Krispies
1/2 cup chocolate chips
Cooking spray
24 Jordan almonds (She used jelly beans)

Preparation
Place 1 (14 oz.) bag sweetened flake coconut in a bowl. Use a toothpick to apply and stir in a few drops of green food dye. Let dry. Melt 1 (7.5 oz.) jar Marshmallow Fluff in a pan over medium-low heat, stirring, until soft and pliable. Stir in 3 cups Rice Krispies. Stir in 1/2 cup chocolate chips; remove from heat. Arrange 8 paper cupcake liners on a work surface. Mist hands with cooking spray. Gather a small amount of cereal mixture and shape to fit into a cupcake liner. Add more cereal to make a rim around top. Let cool. Make 7 more. Fill each nest with a bit of coconut and 3 Jordan almonds.

Sunday, March 17, 2013

Good Morning Granola...


This has been my favorite way to start the day lately.  Healthy, delicious, and quite filling... not to mention EASY to make.  Winner all around!  I have made my own regular granola and honey nut granola, but I have been lazy lately and just found one I like at the store.  It is much cheaper to make your own, though.  Anyway, just giving you a good reason not to hit snooze! :)

Healthy Good Morning Granola and Yogurt (By Lyd
1 cup Vanilla Yogurt
1/2 cup Granola
1/2 cup Trail Mix
Handful of dried cranberries

Layer ingredients and mix in your bowl.
Posted by Picasa

Saturday, March 2, 2013

Butternut Squash Gnocchi

Yes, I'm still at it... sneaking squash into thing. :)  I was amazed how easy this was to make, and although the kids were a little disappointed that they weren't the "chicken nuggets" that they thought they were, they still ate them up. (It's ok... you can admit that you had the same thought. :)  The garlic sage butter was a little strong.  I think they would taste the best with a creamy sauce or in a soup.  We actually put ours into our creamy tomato soup and it was quite delicious.  Just another fun way to sneak in those veggies. :)

Butternut Squash Gnocchi with Garlic Butter and Sage Sauce

For the gnocchi:
3lb butternut squash (I think just about any kind of squash would do.  I used acorn.  I would definitely recommend following my tip below and slow cooking it.  Super easy!)
1 Tablespoon extra virgin olive oil
salt & pepper
1/2 teaspoon salt
1 egg, whisked
2-1/4 cups flour, plus more for rolling

For the Garlic Butter & Sage Sauce (for two, 1-cup servings):
2 Tablespoons butter
1 garlic clove, minced
7-8 leaves fresh sage, chopped
salt & pepper

Directions:
Preheat oven to 400 degrees. Pierce bulb end of butternut squash with a sharp knife several times then microwave for 3 minutes, flipping halfway through. Slice top and bottom off squash, then cut in half lengthwise and remove seeds with a spoon. Place squash halves cut side up on a foil-lined baking sheet then brush with extra virgin olive oil and season liberally with salt and pepper. Roast for 50-60 minutes, or until a knife inserted into the thickest part of the squash meets no resistance.

When squash is cool enough to handle, scoop from peel and place in a food processor. Process until very smooth (or mash by hand) then place puree in a large saucepan over medium heat and cook until it is no longer extremely moist, about 10 minutes, stirring occasionally. Spread squash puree on a plate then refrigerate until cool (doesn’t have to be cold – but will be more difficult to roll out.)

Measure out 2 cups cold squash then place in a large bowl and stir in whisked egg and salt. Add flour, 1 cup at a time, and stir until the dough pulls away from the side of the bowl. Turn out onto a heavily floured surface and knead until dough comes together. (Dough might be sticky, just keep flouring hands lightly.

Remove large hunks of the dough then roll into a rope and cut into 1″ sections to form the gnocchi. Place onto a wax paper or foil-lined baking sheet and freeze until solid then transfer to a freezer bag, or cook gnocchi immediately. Cook frozen gnocchi the same as fresh (do not thaw.)

To cook gnocchi: Bring a large pot of water to a boil then salt lightly. Melt butter in a large skillet over medium heat, then add garlic and sage. Cook until garlic is just starting to turn golden brown.

Add 1 cup gnocchi at a time and to the salted, boiling water, then cook at a gentle boil until gnocchi float to the top, about 2 minutes. Transfer using a slotted spoon or spider to the garlic butter & sage sauce. Cook remaining gnocchi then add to the skillet. Season with salt & pepper then toss to coat, and plate.


*She has some great step by step instructions and pictures.

Lyd's Tip:  My sister was telling me a while back how she chopped up her Halloween pumpkins and put them in her crockpot and they ate them up.  I thought it was brilliant.  I was too lazy to even cut mine up.  I was in a hurry so I just threw the whole thing in, put it on low, and left.  It was done in just a couple hours.  So easy!  No hassle with baking it in the oven forever and burning it.  Love these time savers!
Here they are, ready for a dunk in our creamy tomato soup. Yum!
 
Posted by Picasa

Wednesday, February 20, 2013

How to Hard Boil Eggs in the Oven... (THE BETTER WAY!)


It is just a little white egg.  Why has boiling it always intimidated me so?  I seriously have to google directions every time!  How long to I boil them?  Why did that one just explode?  Did I take them out too early?  Did I leave them in the cold water long enough?  Was the cold water the right temperature?  Then, why is the yoke still runny?  Ok- so it's not rocket science, but it definitely feels like EGG Science.  So imagine my delight when I saw a "pin" suggesting you bake them in the oven.  Rapturous Day!  You can't top these easy fool-proof instructions.  I will never make a hard (not boiled) egg any other way!  My kids loved peeling them. :) I loved shaking up our typical dinner menu.


How to Hard Boil Eggs in the Oven
To make the eggs, simply bake them in a 325 degree oven for 30 minutes. You can place them directly on the rack or use a muffin tin, which makes it easy move them in and out of the oven in bulk. Once the 30 minutes have passed, remove the eggs from the oven (carefully, because they are hot) and plunge them in cold water for 10 minutes.
The shells may have brown spots where they were in contact with hot metal. Sometimes that discoloration fades away in the water plunge, but sometimes it will leave marks on the whites.

*Wouldn't this be perfect for Easter eggs?  This would save a lot of time!

Made a delicious Egg Salad Sandwich for dinner with mine.  What will you make?
Posted by Picasa

Friday, February 15, 2013

Pinto Bean Soup with Cajun-Style Sausage


So Happy {late} Valentine's Day!  I have been busy with sick kids lately, and so instead of making sweets, I've been making soups. How sad is that?  Except that this was a soup that made my hungry crew happy.  I made a big batch of pinto beans in the crockpot.  We used them for beans and rice tacos, but I used the other half in this soup. Dried beans are pretty cheap.  I liked that the beans weren't all that was going on in this soup.  The addition of some fresh veggies and spices made it much more exciting and tasty than a typical bean soup.


Pinto Bean Soup with Cajun-Style Sausage (Diana Rattray)
1 tablespoon olive oil
12 ounces andouille sausage, sliced (I just used ground sausage)
1 medium onion, chopped
2 ribs celery, chopped
1 bell pepper, chopped, red, green, or other color
(I also added chopped zucchini)
2 cans (14.5 ounces each) diced tomatoes
1 1/2 teaspoons Cajun seasoning blend
salt and pepper, to taste
1 quart chicken broth
2 cans (about 15 ounces each) pinto beans, drained and rinsed
2 green onions, thinly sliced
1/4 cup chopped fresh parsley or cilantro

In a large saucepan, heat the olive oil over medium heat. Add the sliced sausage, onion, and celery and saute for about 5 minutes, stirring frequently. Add the bell pepper and continue cooking, stirring, for 3 or 4 minutes longer. Add the diced tomatoes, seasoning blend, salt and pepper, and chicken broth. Add the drained pinto beans. Bring to a boil; reduce heat, cover, and simmer for 15 minutes. Add the green onions and parsley and continue cooking for 2 minutes longer.
Serves 6.

Lyd's Tip: I mentioned recently how I sometimes make my ground beef stretch using a grated potato, but I also like to make my sausage stretch. Are you shocked? :) I add a chopped onion, and sometimes I just don't use as much in the recipe.  I set a little bit aside and refrigerate it.  It's perfect in omelets, quiche, casseroles, or other soups.  Saves me time too, because I can just throw it in.
Posted by Picasa

Tuesday, February 5, 2013

Easy-Pleasing Avocado Sandwich


"A man gets tired of the same ham sandwich everyday," or so my hubby says (in so many words).  He is careful to express his "gratitude" that I make him lunch, but he seemed especially grateful when I switched things up with this little avocado concoction.  He said he could have this one "everyday" but even as good as it is, I have my suspicions that we would eventually repeat this cycle. :)  But for now... he is quite pleased with avocados, so I'll keep them coming.  A little spice and some TLC go a long way.  Who needs meat in their sandwiches anyway? Not him, not today anyway. :)

Easy-Pleasing Avocado Sandwich (From Lyd)
2 Sliced of Good Hearty Whole Wheat Bread
Avodcado sliced (they can be pricey, so I sometimes make them stretch by using 1/4 of a large one or half of medium and then refrigerating the other half.)
Cheddar Cheese, sliced
1 small tomato sliced
pinch of salt
pinch of paprika
pinch of cajun seasoning
little bit of mayo

Spread bread with mayo, layer with cheese, avocado, and tomato.  Sprinkle with seasonings and put a Lyd on in." Send it to work with hubby along with a big kiss... or sit down to one yourself. :) * Guaranteeing to please.
Posted by Picasa

Friday, February 1, 2013

Lyd's Tip: Penny-Pinching with Potatoes...

I am pretty sure I am not the only one that likes to save a buck, so I am diverting from my typical posts for a "Lyd's Tip."  I guess I shouldn't take all the credit-- I dropped by a friends house and she was grating a potato and said she was making tacos... I was confused and she explained further. :)  I was glad I stopped by at just the right moment because it's seems like the price of ground beef in on the rise, and this little tip has saved me some money, and probably some clogged arteries as well. :)

Using a Potato to Stretch Hamburger and Making Two Easy Casseroles
It all begins with a potato.  One potato is probably best if you don't want more potato than burger, but I was extra cheap and grated two. :)
 
Grate away!

Brown about a pound of hamburger.
Lyd's Tip: I like to get my ground beef at our local COOP store (organic, natural foods store).  They sell the grass fed beef there, and if I buy three family packs, they mark the price down significantly.  It's worth asking about.  I put most of it in small zip-lock bags to freeze and use the rest for meals like The Best Meatballs or Mini Cheddar Loaves, that both freeze well and come in handy on a busy night or if I'm taking a meal to someone.  I usually have pasta and the meatballs go great with it for spaghetti.)
Draining it is a "healthy" idea, but if you do, you might want to add just a tablespoons of olive oil.  Add the grated potato and cook for about 10-15 minutes until it is browned and cooked through, stirring or turning occasionally.  Season with salt and pepper.

Once it's cooked through you are good to go.
Here is what I did with mine:
I killed two birds with one stone...
Or you might say, I killed two casseroles with one potato. :)
*Now--I do have to say that these are my stand-by recipes, not really anything to brag about- I am almost ashamed to post them, :) but they freeze well and my kids don't complain because they are familiar.  Also, be forewarned that you will tasted the potato- it doesn't exactly go unnoticed, but it doesn't taste bad either.
 *Divide beef (correction, potato beef :) in two bowls.

For the Speedy Shepherd Pie:
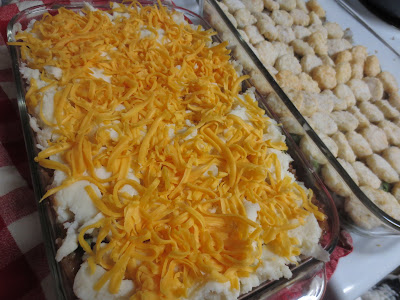
In a large bowl, stir together 1 can on string beans, 1 can of tomato soup, and beef mixture.  Spread in casserole dish.  Top with mashed potatoes and grated cheese.

(Another Lyd's Tip: I am all about saving time, so I make a big batch of mashed potatoes when I make them for Sunday dinner or something, and set some aside for just this occasion.  I have also frozen some in quart size zip-lock bags, and I have found that it actually freezes pretty well, you just reheat in the microwave.  Works well for this purpose.  Instant potatoes are also speedy.)
 For the Speedy Tatertot Casserole:
In a large bowl, stir together 1 can of drained string beans, 1 can of cream of mushroom soup, and beef mixture.  Top with frozen tatertots.
Easy-sh'meezy! (Not to mention cheaper.)
Posted by Picasa

Sunday, January 27, 2013

Best Lemon Cheesecake Ever

So Cheesecake is tough to turn down anyway, but throw freshen it up with a bit of lemon and we're in business!  My friend Sabey made this and had us all foundering on it... my mouth is watering all over again just thinking about it.  I enjoyed the glaze!
*She added about 1 tsp more of lemon zest using fresh lemons.  I loved that she added the mixed berries.  It was the perfect balance of sweet and tart- not to mention beauty. :) YUM!

Best Lemon Cheesecake Ever (Sour Cream Cheesecake)
Source: food.com

Ingredients
Crust
2 1/4 cups graham cracker crumbs
6 tablespoons butter, melted
1/4 cup brown sugar
1 1/2 teaspoons cinnamon

Filling
3 (8 ounce) packages cream cheese, softened 8 hours
3 eggs
3/4 cup sugar
3 tablespoons lemon juice, strained
2 tablespoons flour
2 teaspoons vanilla extract, divided
1 teaspoon lemon zest, finely grated
1 pint sour cream
3 tablespoons sugar

Glaze
1/2 cup sugar
4 teaspoons cornstarch
1/2 cup water
2 tablespoons lemon juice

Directions
Preheat oven to 350°F.
Using your hands or the back of a spoon, mix all crust ingredients in a bowl until well combined.
Press into bottom of an 11 to 12-inch spring form pan.
Bake for 5 minutes.
Let cool; refrigerate until needed.
Using an electric mixer, beat cream cheese at high speed until completely smooth.
Add eggs one at a time, beating until smooth after each addition.
Beat at medium speed as you gradually add the sugar, then flour, lemon juice and 1 teaspoon vanilla, mixing until well blended.
Stir in lemon zest.
Pour into crust; bake at 350°F for 35 minutes.
Blend sour cream with remaining teaspoon vanilla and 3 tablespoons sugar; set mixture in warm place.
Remove cake from oven, and gently spread sour cream mixture on top.
Return to oven and bake for another 12 minutes.
Cool on rack for 30 minutes.
Refrigerate until topping is cool, but not completely chilled.
Combine all glaze ingredients and blend until smooth.
Bring to a boil, stirring constantly until thickened (3 minutes).
Chill until cool, but not set.
Spread on top of cheesecake.
Chill overnight.
 
Posted by Picasa

Tuesday, January 22, 2013

Broccoli Chicken Casserole


You know a casserole is good when your crew wipes out the whole dish. :)  This was a real hit with the family.  The seasonings from the stuffing mix come through and help give it some good comfort food flavor, without the heaviness.  This was a tasty one that didn't take long to make.  In the words of my hubby, "You can definitely make this one again!"
Don't mind if I do.

Lyd's Tip: I don't know about you, but when I throw raw broccoli into a casserole, it always comes out kind of crispy still- just seems like it takes longer to cook.  I like to put it in a microwave safe bowl and nuke it for just a few minutes before I put it into the casserole so that it comes out tender and tasty... instead of totally raw... which is probably better for you, but hey, don't push me, at least I put it in. :)


Broccoli Chicken Casserole (Taste of Home)
1-1/2 cups water
1 package (6 ounces) chicken stuffing mix
2 cups cubed cooked chicken
1 cup frozen broccoli florets, thawed
1 can (10-3/4 ounces) condensed broccoli cheese soup, undiluted
1 cup (4 ounces) shredded cheddar cheese

In a small saucepan, bring water to a boil. Stir in stuffing mix. Remove from the heat; cover and let stand for 5 minutes.
Meanwhile, layer chicken and broccoli in a greased 11-in. x 7-in. baking dish. Top with soup. Fluff stuffing with a fork; spoon over soup. Sprinkle with cheese.
Bake, uncovered, at 350° for 30-35 minutes or until heated through. Yield: 6 servings.

Nutritional Facts
1 serving (1-1/3 cups) equals 315 calories, 13 g fat (6 g saturated fat), 66 mg cholesterol, 1,025 mg sodium, 25 g carbohydrate, 2 g fiber, 23 g protein.
Posted by Picasa

Tuesday, January 15, 2013

Coconut-Lime Cake


Someone very special to me had a birthday. :)  Now German Chocolate Cake has always been the stand-by for this guy, but he was sweet and let me switch it up.  He loves lime and he loves coconut... so of course you "put de lime in de coconut and drink 'em bot' up." :)
And SWEET would just about cover the description... cloyingly sweet.  It was too much for me, but it was still really fun to try something new- really labor intensive icing- I've never tried the kind where you have to dissolve and melt the sugar and meringue-ish the egg whites etc.  I know this is probably illegal to say, but to me it tasted just like that marshmallow jet puff spread, which could really save some time.  Basically sweet (cake), on sweet (icing), on sweet (coconut flakes).  We had company, and they said it was good, but you never know if they are "just being nice" or if they really liked it. I liked the lime, but the actual cake wasn't very moist... on the whole, this isn't one I plan on making again.  Just not a winner for me, but fun in theory.   And the birthday boy was still happy, although I'm imagine he was dreaming of German Chocolate. :)


Coconut-Lime Cake
For the cake:
3 1/4 cups cake flour
1 Tbs. baking powder
3/4 tsp. salt
1 3/4 cups milk
1 Tbs. vanilla extract
16 Tbs. (2 sticks) unsalted butter
2 cups sugar
1 Tbs. finely chopped lime zest
4 eggs
For the frosting:
4 egg whites
1 1/3 cups sugar
1/2 cup light corn syrup
1/8 tsp. salt
1 tsp. vanilla extract
2 1/2 cups sweetened shredded coconut

Directions:
Have all the ingredients at room temperature.

Position a rack in the lower third of an oven and preheat to 350°F. Grease and flour three 8-inch round cake pans; tap out excess flour.

To make the cake, over a sheet of waxed paper, sift together the flour, baking powder and salt; set aside.

In a small bowl, stir together the milk and vanilla; set aside.

In the bowl of an electric mixer fitted with the flat beater, beat the butter on medium speed until creamy and smooth, 1 to 2 minutes. Add the sugar and lime zest and continue beating until light and fluffy, about 5 minutes, stopping the mixer occasionally to scrape down the sides of the bowl. Add the eggs one at a time, beating well after each addition. 

Reduce the speed to low and add the flour mixture in three additions, alternating with the milk mixture and beginning and ending with the flour. Beat each addition just until incorporated, stopping the mixer occasionally to scrape down the sides of the bowl.

Spoon the batter into the prepared pans, spreading the batter evenly. Bake until the cakes begin to pull away from the sides of the pans and a toothpick inserted into the center comes out clean, 25 to 30 minutes. Transfer the pans to a wire rack and let the cakes cool in the pans for 15 minutes, then turn them out onto the rack and let cool completely.

Meanwhile, make the frosting: In the bowl of an electric mixer, using a handheld whisk, beat together the egg whites, sugar, corn syrup and salt just until combined, about 30 seconds. Place the bowl over but not touching simmering water in a saucepan and whisk until the sugar dissolves and the mixture is hot, 2 to 3 minutes.

Set the bowl on the mixer fitted with the whisk attachment and beat on medium speed for 3 minutes. Add the vanilla and beat until the outside of the bowl is cool and medium-firm peaks form, 2 to 3 minutes. Using a rubber spatula, fold in 1 cup of the coconut just until incorporated.

Place one cake layer, top side down, on a serving plate. Using an icing spatula or a knife, spread some of the frosting evenly on top. Place a second layer, top side down, on the first layer and spread some of the frosting evenly on top. Place the remaining layer, top side down, on the second layer. Spread the remaining frosting over the top and sides of the cake. Press the remaining 1 1/2 cups coconut onto the top and sides. Refrigerate the cake for 30 minutes before serving to set the frosting.

Serves 12.
 
Posted by Picasa

Friday, January 4, 2013

Wheat Berry Pudding


So I was recipe hunting and a recipe for "Wheat Berry Pudding" totally caught my eye, because even with my love for a good bowl of cracked wheat, no matter how much sugar you put in it, you just can't call it dessert... wouldn't you agree? And let me back up and say that my love is sincere.  I have fond memories of mom at the stove in her PJ's on a cold winter morning, cooking up some good old fashioned cracked wheat before we had to catch the bus.  I'm pretty sure I was the only one who gobbled it up without complaint.  Ok- so I have unusual taste buds.  I am embarrassed to admit that sometimes it sat there all day- undisturbed, with one big scoop missing, and I would eat it again for my "after-school-snack." Yep- just had to make sure you understood that I really like hot cereal. :)  So I didn't have a food processor or the dutch-oven to try this out, but I followed it as closely as I could and tried to speed up the process a bit.

Lyd's Tip:  I used cracked wheat because it cooks a lot faster. (If you only have wheat berries, you can just pulse them a couple times in the blender—it will be noisy, but it will cook in about half the time.)

Dessert or not?  I'm still a little undecided.  I liked it a lot, but then I liked it before, so I'm probably not the best judge. :)  I liked the cinnamon a lot though and I just got a food processor for Christmas (can we say REALLY HAPPY ME!) and I am anxious to try this out again using "proper methods" just because I am truly fascinated that cracked wheat could be served as a healthy, delicious dessert. Who knew?  Who still doesn't know?  Me either...
I'll keep you posted on my findings, but here is the recipe so far:

Wheat Berry Pudding (EatingWell)

1 cup wheat berries, (see Note) (Remember my tip about the cracked wheat)
2 tablespoons plus 3 cups low-fat milk, divided
1 cinnamon stick
1 strip orange zest, (1/2 by 2 inches)
Pinch of salt
1/2 cup pure maple syrup
1 teaspoon vanilla extract
1/2 teaspoon ground cinnamon
1/2 cup low-fat maple yogurt, (optional)

Sort through wheat berries carefully; discard any stones. Rinse well. Place in a large heavy saucepan and add water to cover by 2 inches. Bring to a boil, reduce heat to medium-low, cover and simmer, adding more water if necessary, until the wheat berries are tender, about 1 hour. Drain well.
Place the wheat berries and 2 tablespoons milk in a food processor. Pulse, scraping down the sides as necessary, until most of the wheat berries are coarsely chopped (some may remain whole).
Combine the chopped wheat berries, the remaining 3 cups milk, cinnamon stick, orange zest and salt in a Dutch oven or other large, heavy-bottomed pot and bring to a boil. Reduce heat to medium-low and cook, stirring often to prevent sticking, until the mixture is very thick, 25 to 30 minutes. Remove from the heat; discard the cinnamon stick and orange zest. Stir in maple syrup and vanilla.
Serve warm or chilled, sprinkled with cinnamon and topped with a dollop of maple yogurt, if desired. (Stir in more milk if the pudding gets too thick as it stands.)

TIPS & NOTES
Make Ahead Tip: Cover and refrigerate the cooked wheat berries (Step 1) for up to 2 days or freeze for up to 1 month. Cover and refrigerate the pudding for up to 2 days.
Note: Wheat berries of any variety (hard, soft, spring or winter) can be used interchangeably. Labeling is inconsistent—you may find them labeled “hard red winter wheat” without the words “wheat berries.” Find them in natural-foods markets and online at kingarthurflour.com. Some recipes instruct soaking overnight, but we found it unnecessary.
To cook: Sort through wheat berries carefully, discarding any stones, and rinse with water. Bring 4 cups water or broth and 1 cup wheat berries to a boil. Reduce heat to a simmer, cover and cook, stirring occasionally, until tender, but still a little chewy, about 1 hour. Drain.

NUTRITION
Per serving: 182 calories; 2 g fat ( 1 g sat , 0 g mono ); 6 mg cholesterol; 35 g carbohydrates; 7 g protein; 3 g fiber; 71 mg sodium; 43 mg potassium.
Carbohydrate Servings: 2
Exchanges: 1 starch. 1/2 low-fat milk, 1 other carbohydrates
Posted by Picasa

Tuesday, January 1, 2013

Crash Hot Potatoes


Happy New Year!!!  Hope you are ready to ring in the new year with some good recipes!  This was one we made over the break and it made an easy tasty side.  Pioneer woman rocks... but then I'm sure you already knew that. :)

Crash Hot Potatoes (Pioneer Woman)
12 whole New Potatoes (or Other Small Round Potatoes)
3 Tablespoons Olive Oil
Kosher Salt To Taste
Black Pepper To Taste
Rosemary (or Other Herbs Of Choice) To Taste

Bring a pot of salted water to a boil. Add in as many potatoes as you wish to make and cook them until they are fork-tender.
On a sheet pan, generously drizzle olive oil. Place tender potatoes on the cookie sheet leaving plenty of room between each potato.
With a potato masher, gently press down each potato until it slightly mashes, rotate the potato masher 90 degrees and mash again. Brush the tops of each crushed potato generously with more olive oil.
Sprinkle potatoes with kosher salt, fresh ground black pepper and fresh chopped rosemary (or chives or thyme or whatever herb you have available.)
Bake in a 450 degree oven for 20-25 minutes until golden brown.
Posted by Picasa

Monday, December 24, 2012

Almond Chocolate Fudge


MERRY CHRISTMAS!!!
I'm sneaking all these sweets in before our New Year's resolutions. :)  Plus this is a must!  Is Christmas complete without a bit of fudge?  I have made it a couple times, and this has been my favorite recipe so far.  Super easy and I like the texture and richness of the cream cheese.  I made this again with white chocolate and I sprinkled crushed candy-canes on the top.  It was cute.  Got to love a recipe you can play around with.


Almond Chocolate Fudge
1 teaspoon butter
1 package (8 ounces) cream cheese, softened
3-3/4 cups confectioners' sugar
6 ounces unsweetened chocolate, melted and cooled
1/4 teaspoon almond extract
Dash salt
1/4 cup slivered Almonds (or other nut)

Line a 9-in. square pan with foil and grease the foil with butter; set aside. In a large bowl, beat cream cheese until fluffy. (I never noticed it get "fluffy"- I found that a little confusing.  Maybe they meant creamy?) Gradually beat in confectioners' sugar. Beat in the melted chocolate, extract and salt until smooth. 
Spread into prepared pan. Sprinkle and press almonds over the top.  Cover and refrigerate overnight or until firm. Using foil, lift fudge out of pan. Gently peel off foil; cut fudge into 1-in. squares. Store in an airtight container in the refrigerator. Yield: 2-1/2 pounds.

Nutritional Facts:  1 piece equals 49 calories, 3 g fat (1 g saturated fat), 3 mg cholesterol, 15 mg sodium, 7 g carbohydrate, trace fiber, 1 g protein. Diabetic Exchanges: 1/2 starch, 1/2 fat.

 
Posted by Picasa

Sunday, December 23, 2012

Easy Crispy Peanut Butter Balls


I went "nuts" with these guys, gained 5 lbs. and now we're through. :)  It was true love while it lasted though.  A happy addition to any holiday goodie plate.  Super easy to make!  The kids had fun helping me shape the balls.  I served some of them chocolate dipped and some not... quite frankly because chocolate and I do not always get along- it is way to finicky.   Most of what I melted was made into fudge because it just wouldn't cooperate even with a double boiler... But I would say that isn't necessarily a bad thing. :)  So loosen that belt and help yourself. :)  Happy Holidays!


Easy Crispy Peanut Butter Balls cooks.com
2 c. crunchy peanut butter
1/2 c. butter
1 lb. confectioners' sugar
3 c. Rice Krispies
Dipping chocolate

(Creamy peanut butter is just as good, but add 1/4 cup more Rice Krispies if you use creamy.)
Combine peanut butter, butter and confectioners sugar in large bowl. Blend well. Add rice cereal. Form into 3/4 inch balls and dip into dipping chocolate. Makes about 75 or more balls. Great for holiday gifts.
Proof of my poor dipping abilities... oh well.  Don't judge a person by how they dip chocolate, please. :)

Sunday, December 16, 2012

Nanaimo Bars


You know I love food, but have I ever mentioned how much I love to devour... books?  Good food, good books... I could die happy.  I usually have to find the audio version or I'll never get through it with the FREQUENT kid-interruptions.  It is a fantastic motivator for doing dishes!  You know I'm in the middle of a good book when I have no dishes in my sink... or sometimes it can have the opposite effect and I'm cooking and baking everything, all over the place; I won't leave the kitchen, because I have to finish the book. (I'm embarrassed to admit Harry Potter did that to me.)
I am part of such a delightful book group.  I love these ladies dearly!  We talk books, we laugh and cry together... then we eat Nanimo Bars. (Well, not every time, we just happened to be lucky enough to have our Canadian friend, Melinda hosting, and she whipped these up; which, after examining the recipe, was no small feat!)  They are quite delicious- I liked the little creamy layer.  They were saying you can find that vanilla custard powder at most grocery stores.
Happy reading... I mean eating. :)

*A little history, thanks to Wikipedia:

The Nanaimo bar is a dessert item of Canadian origin popular across North America. It is a bar cookie which requires no baking and is named after the West Coast city of NanaimoBritish Columbia. It consists of a wafer crumb-based layer topped by a layer of light vanilla or custard flavored butter icing which is covered with melted chocolate made from chocolate squares. Many varieties exist, consisting of different types of crumb with different flavors of icing (e.g.,mintpeanut butter) and different types of chocolate. Two popular variations on the traditional Nanaimo bar involve mint- or mocha-flavored icing.


Nanaimo Bars  

INGREDIENTS

Bottom Layer:
1/2 cup unsalted butter
1/4 cup granulated white sugar
1/3 cup cocoa powder
1 large egg, lightly beaten

Middle Layer:
1/4 cup butter, room temp.
1/2 teaspoon pure vanilla extract
2 - 3 tablespoons milk or cream
2 cups confectioners (icing) sugar
2 tablespoons vanilla custard powder (Bird's) or vanilla pudding powder

Top Layer:
5 ounces semisweet chocolate

DIRECTIONS

Line a 9 x 9 inch pan with a single sheep of parchment paper, leaving enough room that you can grab the paper on two sides so you can lift the bars out when they are finished. This makes it MUCH easier to cut.

Bottom Layer: In a saucepan over low heat, melt the butter. Remove from heat and stir in the sugar and cocoa powder and then gradually whisk in the beaten egg. Return the saucepan to low heat and cook, stirring constantly, until the mixture thickens (1 - 2 minutes). Remove from heat and stir in the vanilla extract, graham cracker crumbs, coconut, and chopped nuts. Press the mixture evenly onto the bottom of the prepared pan. Cover plastic wrap and refrigerate until firm (about an hour).

Middle Layer: In your electric mixer, or with a hand mixer, beat the butter until smooth and creamy. Add the remaining ingredients and beat until the mixture is smooth. If the mixture is too thick to spread, add a little more milk. Spread the filling over the bottom layer, cover, and refrigerate until firm (about 30 minutes).

Top Layer: Chop the chocolate into small pieces. Then, in a heatproof bowl, over a saucepan of simmering water (or a double boiler if you have one), melt the chocolate and butter. Spread the melted chocolate evenly over the filling and refrigerate for about 10 minutes or just until the chocolate has set.

When the bars are sufficiently chilled, lift the parchment paper and put on a large cutting board. Remove the paper. To cut the bars, press down on the bars with a sharp knife.

1 teaspoon pure vanilla extract
2 cups graham cracker crumbs
1 cup dried coconut
1/2 cup chopped walnuts
1 tablespoon unsalted butter

Do not use a sawing motion. From time to time, rinse your knife under hot water and dry quickly with a paper towel. You will get much cleaner edges by pressing instead of sawing.
Posted by Picasa