Wednesday, September 29, 2010

Curried Chicken Salad with Blackberries

Blackberries, I'm not finished with you! I had to throw them in one last thing before they went out of season. Doug LOVED this salad- it has a really strong taste and a lot of different flavors going on. It was not my cup of tea, so to speak. I guess I am a little too traditional sometimes- I have always preferred the "original" flavor... like with chips, or drinks, or what not. It is hard for me to branch out, but maybe it will be easier for you. You might just love this one like Doug. It was really pretty- I went nuts over the beautiful rusty color as you mix the curry and the mango chutney (which I didn't actually have- but now I can't remember what I cleverly substituted, and that might have been the problem. Hmmm.) It was the most beautiful color!

Curried Chicken Salad with Blackberries (Family Circle)
3 tablespoons olive oil
1 pound boneless, skinless chicken breasts
1/4 teaspoon salt
1/8 teaspoon black pepper
1/3 cup light mayonnaise
2 tablespoons mango chutney
1 tablespoons lemon juice
1-1/2 teaspoons curry powder
1/4 teaspoon ground ginger
1/4 cup raisins
1 celery rib, chopped
1 scallion, chopped
1-1/2 cups blackberries
1/2 cup roasted salted cashews

1. Heat 1 tablespoon of the olive oil in a large skillet over medium-high heat. Season chicken with salt and pepper. Sauté for 5 minutes per side or until internal temperature registers 160 degrees F on an instant-read thermometer. Cool and cut into 1/2-inch pieces. 2. In large bowl, combine remaining 2 tablespoons olive oil, mayonnaise, mango chutney, lemon juice, curry powder and ginger. Stir in chicken, raisins, celery and scallion. Gently stir in berries. Refrigerate for at least 30 minutes. Just before serving, sprinkle with cashews.
Posted by Picasa

Monday, September 27, 2010

Easy (or Complicated) Tortellini Toss: You tell me.

A friend gave me a Pampered Chef catalog- I love looking through and wishing and wishing and wishing. They have a lot of awesome stuff for the kitchen... I just can't afford it. And then they'll say, "Oh of course you can, all you have to do is host a party, etc." Now I'm really not complaining (except maybe that I wish I had the funds) and I'm not trying to offend anyone. Let me tell you, I would ten times rather participate in or host a FOOD related party over candles, jewelry, or any other doo-dahs. Anyway, I'm done with my little "shpill" and all I was saying, was that I found this recipe in the catalog. I think they call this recipe "easy" because they use a microwave, but in my humble opinion, I really like the idea and food combination, but I would have left the microwave out of it. I think these instructions are ridiculous- not easy... 4-5 minutes here and whisk every 60 seconds there. And I think doing this in the microwave rather then a stove top complicates something that could have been quite simple. Making a white sauce over the stove is pretty simple. Making a white sauce in the microwave: complicated. Just shooting that out there for what it's worth. I also think the microwave gave this kind of a rubbery texture, but still a good idea- great ingredient combo. Try it out and tell me what you think. Or try it out the RIGHT WAY and tell me what you think. :) And sorry to sound to raunchy today. I really am happy- food does that to me... even when it isn't perfect.

Easy Tortellini Toss (The Pampered Chef)
3 tbsp butter, melted
3 tbsp all-purpose flour
1 garlic clove, pressed
1 cup 2% milk
2 1/2 oz Parmesan cheese, grated (about 2/3 cup)
1 (8 oz) slice deli ham (1/2 in. thick)
1/2 tsp coarsely ground black pepper
1 bag (16 oz) frozen cheese-filled tortellini
1 can (14.5 oz) chicken broth
6 cups loosely packed fresh baby spinach leaves

1. Combine butter and flour in Classic Batter Bowl; whisk until smooth. Add pressed garlic and milk to butter mixture; whisk well. Microwave, covered, on HIGH 3-4 minutes or until thickened, stirring every 60 seconds. Add cheese; whisk until smooth. Dice ham using Chef's Knife. Add ham and black pepper to batter bowl. Mix well using Small Mix ‘N Scraper®; set aside.
2. Combine tortellini and broth in Deep Covered Baker. Microwave, covered, on HIGH 12-15 minutes or until tortellini are tender, stirring every 4-5 minutes. Add cheese sauce to baker; mix well. Microwave, covered, on HIGH 2-3 minutes or until heated through. Stir in spinach; cover and let stand 2-3 minutes or until spinach is wilted.

Yield: 6 servings

Nutrients per serving: (about 1 cup): Calories 330, Total Fat 14 g, Saturated Fat 8 g, Cholesterol 55 mg, Carbohydrate 33 g, Protein 21 g, Sodium 1280 mg, Fiber 4 g
Posted by Picasa

Sunday, September 26, 2010

Luscious Four-Layer Pumpkin Cake


Yes... is it beautiful. Yes... that is a yummy cream filling. Yes... that is caramel drizzling down the sides and pooling at the bottom. And Yes... it was so incredibly delicious! "Wow- this is Thanksgiving worthy!" were my husbands first words as he bit into this AMAZING cake, and he was absolutely right! Would you believe that I won this beauty at a Ward Dessert Auction! (We bid with points instead of money.) It was the first dessert auctioned and I got a SCREAMIN' DEAL (people are always a little gun-shy at the beginning of auctions) and let me tell you that I was screamin' by the time I cut a slice and took a bite. This cake looks beautiful and it tastes even better! A big winner. If you click on the Kraftfood's link, there is even a video tutorial on how to make it. My friend Jen (who made this beauty) said it is super easy... but then isn't that what every professional says? She did an amazing job and somehow, by eating her cake, I just feel like we are best friends. Anyone who makes cake like this is a very good person in my book. :)

Luscious Four-Layer Pumpkin Cake (Kraftfoods.com)
1 pkg. (2-layer size) yellow cake mix
1 can (15 oz.) pumpkin, divided
1/2 cup Milk
1/3 cup Oil
4 Eggs
1-1/2 tsp. Pumpkin pie spice, divided
1 pkg. (8 oz.) PHILADELPHIA Cream Cheese, softened
1 cup Powdered sugar
1 tub (8 oz.) COOL WHIP Whipped Topping, thawed
1/4 cup Caramel ice cream topping
1/4 cup chopped PLANTERS Pecans

HEAT oven to 350°F.
BEAT cake mix, 1 cup pumpkin, milk, oil, eggs and 1 tsp. spice in large bowl with mixer until well blended. Pour into 2 greased and floured 9-inch round pans.
BAKE 28 to 30 min. or until toothpick inserted in centers comes out clean. Cool in pans 10 min. Remove from pans to wire racks; cool completely.
BEAT cream cheese in medium bowl with mixer until creamy. Add sugar, remaining pumpkin and spice; mix well. Gently stir in COOL WHIP. Cut each cake layer horizontally in half with serrated knife; stack on serving plate, spreading cream cheese filling between layers. (Do not frost top layer.) Drizzle with caramel topping just before serving; top with nuts. Refrigerate leftovers.

Kraft Kitchens Tips
Size-Wise

Celebrate and enjoy a serving of this indulgent cake on a special occasion.

How to Slice and Stack Cake Layers
Place 1 of the cooled cake layers on serving plate. Make 2-inch horizontal cut around side of cake, using long serrated knife. Cut all the way through cake layer to make 2 layers. Remove top layer by sliding it onto 9-inch round cardboard circle. Frost cake layer on plate with 1/3 of the COOL WHIP mixture. Slide top half of split cake layer from cardboard circle onto frosted layer on plate. Place the remaining unsplit cake layer on a cutting board. Cut into 2 layers as done for the first layer. Repeat process of transferring cake layers to stacked cake layers on plate using the cardboard circle.

Substitute
Omit caramel sauce. Microwave 10 KRAFT Caramels and 1 Tbsp. milk in microwaveable bowl on HIGH 2 min. or until caramels begin to melt. Stir until caramels are completely melted. Drizzle over cake just before serving; top with nuts.
Posted by Picasa

Saturday, September 25, 2010

Healthy Raisin and Nut Truffle Ball

My friend Melissa brought over this healthy snack for me to sample. I just have to tell you that this one is brilliant! It is so easy to prepare and it is totally "craving" satisfying. If you have a food processor, you are so stinkin' lucky! I had to use my blender, and it still worked, but it was a little harder. Melissa also made a raw chocolate and coconut one that was amazing- I need to get the recipe. This one is supper simple though- you've got to try it! It is surprising how yummy it is! My kids really liked them, and they thought it was dessert. :)

Healthy Raisin and Nut Truffle Balls (From Melissa Rauch)
1 cup nuts (walnuts or pecans work best because they are a bit more moist)
1 cup raisins (I used dried cranberries because I didn't have raisins at the time and it was really yummy and worked great. I bet you could really get creative with dried fruit!)
1 tsp vanilla (or less)

That is seriously it! You just put it in a food processor (or blender with a lot of love) until it mixes really well, then you just form little balls with your fist-- very rough little balls if you are like me. Notice Melissa's lovely, perfectly spherical balls at the top. :) Hey- they taste the same either way! :) I froze mine and whenever I need a little snack I pull them out.
Posted by Picasa

Thursday, September 23, 2010

Lemony Garlic Chicken Thighs

I was just going to use regular chicken breasts for this, but I was pleasantly surprised surprised how easy it is to pull the skins off chicken thighs. (That phrase probably doesn't belong in the same sentence with chicken skin, but whatever. :) They provide a flavorful meat that is pretty simple to prepare. (Not to mention they are pretty inexpensive- you can usually get them for around a dollar a pound.) I was skeptical about how they would work in a slow-cooker, but again I was "pleasantly surprised" that they held together nicely and this yummy blend of ingredients lent itself to a wonderful flavor and a delicious meal! It still sounds really good, but I didn't do the baby spinach and pasta- I didn't have them on hand and I ended up just doing a nice salad and rice with some of the drippings on top.

Slow Cooker Lemony Garlic Chicken Thighs (Family Circle Aug 2010)
8 Skinless Chicken Thigh
6 cloves Garlic Clove
1/3 cup Lemon Juice
1/3 cup Chicken Broth, Reduced Sodium
1 tbsp Cornstarch
1/4 tsp Salt
1/4 tsp Pepper, Black
2 1/2 cups Baby Spinach
1/2 of package Smart Taste Thin Spaghetti

place chicken thighs in slow cooker, top with smashed garlic cloves. In a small bowl, stir together 1 tbsp lemon zest,juice,and chicken broth, and pour half of it (about 1/3c) into slow cooker. Cover and cook 3 hours on high or 5 hours on low.Remove chicken thighs to a platter, keep warm, and discard the garlic cloves. Into remaining lemon juice mixture (from earlier) stir in cornstarch, salt and pepper. Whisk this into warm slow cooker with chopped packed (into 1 cup) spinach. Cook another 1/2 hr, meanwhile making pasta as directed. I added all things together back in slow cooker and stirred it all up! Enjoy!!
Posted by Picasa

Monday, September 20, 2010

Homemade Oreo Cookies


So what is better then delicious chocolate cookies? Delicious chocolate cookies with vanilla Cream filling. Mmmmm... dangerously good. No really... like I might have a heart-attack any minute. You should not have more then one... or two in one sitting. They freeze really well. :) And the taste really good... every day.

Lyd's Tip: I used the old zip-lock bag piping technique to get the icing on in a good way. The kids had a lot of fun helping. Have your kids flip the cooled cookies over for you, and give them the job of putting them together. They have fun being involved in the yummy action. :)

I used Debra's Double-Chocolate Chip Cookie recipe. I think it is just a little better, but I'll post this other one just in case you are interested.

Homemade Oreo Cookies
(Mommy's Kitchen)

Cookie Recipe
1 package devil's food cake mix
2 eggs
1/2 - cup oil
(or butter flavored shortening) Heat oven to 350 degrees. Add oil and eggs to cake mix and blend together. Roll dough into balls (a little larger than a quarter). Place on greased cookie sheet. Bake for 8 minutes. Remove from oven and let cool on sheet (until warm). Remove cookies from sheet and place on cooling rack.To assemble the cookies, in a pastry bag with a 1/2 inch, round tip (you can always use a zip lock bag with a round tip or just use a butter knife)add about a tablespoon of filling into the center of one cookie. Place another cookie similar in size on top of the filling. Lightly press, to work the filling evenly to the outsides of the cookie. Continue this process until all the cookies have been sandwiched with cream.

Vanilla Cream Filling Recipe:
1/4 cup (1/2 stick) room-temperature, unsalted butter
1/4 - cup vegetable shortening
2 - 3 - cups sifted confectioners’ sugar
2 - teaspoons vanilla extract

Cream butter and shortening together. Add add vanilla extract and confectioner's sugar slowly until you reach your desired consistency.
Posted by Picasa

Sunday, September 19, 2010

Savory Sausage and Rice


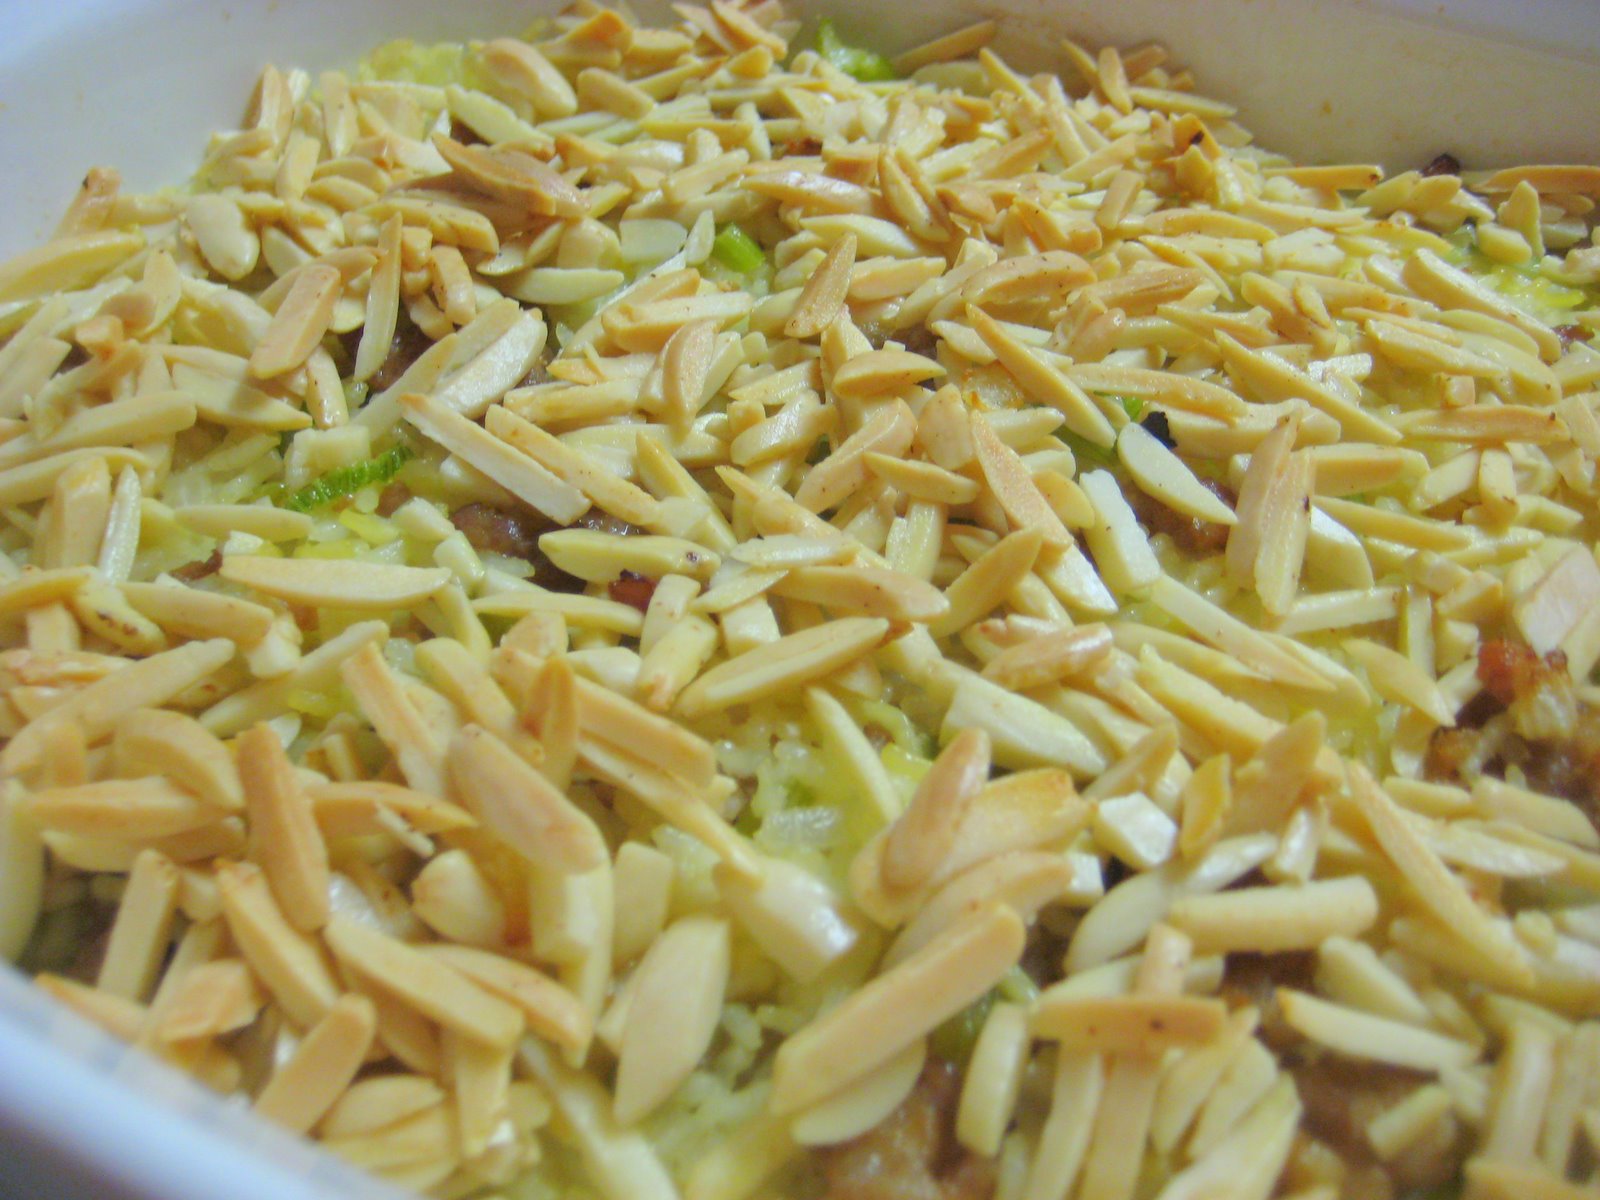
This made a yummy casserole, and gives you some good left overs. (This was what I made, and set aside some extra sausage for the breakfast burritos.

Savory Sausage and Rice (Afton Richards)
1 lb. ground sausage
1-2 cups chopped celery
1/2 cup onions
1 package chicken noodle Lipton soup
1 1/2 cups boiling water

Combine water soup and rice. Cook until tender. Brown sausage; add celery and onions; cook until tender. Combine in baking dish. Toss slivered almonds with 1/4 cup of melted butter. Pour over mixture. Bake at 375 for 20 minutes.
Posted by Picasa

Thursday, September 16, 2010

Black Bean Salad

I think I have made Black Bean Salsa a couple times- each time just a little different, but this was a yummy mix, and an easy one to throw together. I didn't have very much cilantro and I did add some avocado, which was a good addition.

Black Bean Salad (From Afton Richards)
1 can black beans drained and rinsed
3/4 cup frozen corn (or one can drained)
1/2 small red pepper chopped
3 green onions sliced
1/2 jalapeno pepper, chopped (seeds removed)
1 tomato chopped

Dressing:
2 T lime juice
1/2 tsp salt
2 tsp olive oil
1/2 clove garlic crushed
1 tsp sugar

Combine dressing ingredients in a jar, shake well. Combine salad ingredients in a bowl and toss with salad dressing. Marinate for 30 minutes in the fridge before serving.
Posted by Picasa

Wednesday, September 15, 2010

Then Along Comes Pudding...

I love pudding- I always have. I used to BEG my mom to make me tapioca pudding- she would sometimes do it for me on Sunday nights. Happy memories! Something about that baby food texture- have I made that confession... that I sometimes eat my baby's baby food? Only the fruity flavors mind you, but truly I must have a mineral deficiency or something, I know... but there you have it. Anyway- pudding give me the same kind of satisfaction. This ended up being a wonderful use for some of our milk that was just about to expire- a great way to sweeten up and disguise it. :) Don't laugh, but I quadrupled that recipe- I didn't even know it could be done. I had to get the calculator out. :) Two cups is just never enough. Yes... it was intense. And I know it is a simple things, but I threw in some fresh blackberries and a pinch of cinnamon and it was just heavenly! But I guess, keep in mind this IS coming from a baby-food lover, so take it with a grain... or a bib. :)

Homemade Vanilla Pudding (Allrecipes.com)

  • 2 cups milk
  • 1/2 cup white sugar
  • 3 tablespoons cornstarch
  • 1/4 teaspoon salt
  • 1 teaspoon vanilla extract
  • 1 tablespoon butter

Directions

  1. In medium saucepan over medium heat, heat milk until bubbles form at edges. In a bowl, combine sugar, cornstarch and salt. Pour into hot milk, a little at a time, stirring to dissolve. Continue to cook and stir until mixture thickens enough to coat the back of a metal spoon. Do not boil. Remove from heat, stir in vanilla and butter. Pour into serving dishes. Chill before serving.
Posted by Picasa

Saturday, September 11, 2010

Ham and Cheddar Scones... a happy home for dill!

What's the "dill" pickle? (My Mom always said that growing up!) Well, here is the deal, I have found a happy place for dill weed (besides a pickle)!!! I previously doubted the possibility- I have tried it in a few things and it's over-powering flavor makes everything taste "pickley" without the "perk," so this fabulous scone was a very happy discovery for me! Not to mention- IT IS DELICIOUS!!! I was about to label this under "Let there be LITE" but then I remembered... oh yes... that whole cube of butter. :) Which, by the way, I don't regret! And at least you can ease your conscience knowing there is whole wheat flour in there, and I used extra-lean turkey ham that tasted great. I sometimes like getting those little hams you can cut up yourself. They are great for things like this or cut up in eggs, etc. Anyway- these scones are wonderful. They make a great breakfast, snack, or I even sent some with my husband for a lunch. They were totally worth the work! So yummy!!!

Ham and Cheddar Scones (Better Homes and Garden Magazine)
1-3/4 cups all-purpose flour
1/4 cup whole wheat flour
2 tsp. baking powder
1 tsp. sugar
1/2 tsp. baking soda
1/8 tsp. salt
1/2 cup butter
1/2 cup shredded sharp cheddar cheese (2 oz.)
1/4 cup diced cooked ham
1 Tbsp. chopped fresh dill or 1 tsp. dried dillweed
3/4 cup dairy sour cream
1 egg, lightly beaten
1 Tbsp. Dijon-style mustard
Fresh dill (optional)

1. Preheat oven to 375 degrees F. Line a baking sheet with parchment; set aside. In a large bowl combine all-purpose flour, whole wheat flour, baking powder, sugar, baking soda, and salt. Using a pastry blender or two knives, cut in butter until mixture resembles coarse crumbs. Stir in cheese, ham, and dill. Combine sour cream, egg, and mustard; add all at once to flour mixture. Using a fork, stir just until mixture is moistened, Do not overwork.
2. Turn dough out onto a lightly floured surface. Knead dough by folding and gently pressing it for four to six strokes or just until dough holds together. Pat or lightly roll dough until 3/4 inch thick. Cut dough with a floured 2-1/2- to 3-inch biscuit cutter. Reroll scraps as necessary, dipping cutter into flour between cuts. Place dough circles 1 inch apart on prepared baking sheet. Bake for 18 to 20 minutes or until golden. Cool slightly on a wire rack. Serve warm. If desired, sprinkle with fresh dill. Makes 10 to 12 scones.

(I wanted to mention that I had some trouble with the whole "biscuit cutter" process, so I ended up kneading the whole thing, rolling it like it says, and just cutting it into squares or something if you don't have one.)

Nutrition Facts
Calories237,
Total Fat (g)15,
Saturated Fat (g)9,
Monounsaturated Fat (g)4,
Polyunsaturated Fat (g)1,
Cholesterol (mg)61,
Sodium (mg)363,
Carbohydrate (g)20,
Total Sugar (g)1,
Fiber (g)1,
Protein (g)6,
Vitamin C (DV%)1,
Calcium (DV%)14,
Iron (DV%)8,
Percent Daily Values are based on a 2,000 calorie diet
Posted by Picasa

Thursday, September 9, 2010

Breakfast Burritos for Two (or FIVE)

This was easy to mix together and it has a good flavor. Doug loves stuff like this in the mornings. I'm an oat-meal and fruit kind of gal, but we have to make things fair, right?

Lyd's Tip: Make this the morning after you had sausage with your dinner. When you are cooking it up that night, just save a little bit for the next morning. It will save you that cooking time and hassle! All you have to do is throw it in.

Breakfast Burritos for Two (or 5 if you are like me and make it stretch. :)
(Simple and Delicious Magazine)
2 ounces bulk pork sausage
2 eggs (I added more eggs.)
2 tablespoons chopped tomato
2 tablespoons chopped onion
2 teaspoons canned chopped green chilies
Dash pepper
2 slices process American cheese
2 flour tortillas (10 inches), warmed
3 tablespoons salsa
3 tablespoons sour cream

In a large skillet, cook sausage over medium heat until no longer pink; drain. In a large bowl, whisk the eggs, tomato, onion, chilies and pepper. Add to the skillet; cook and stir until set.
Place a cheese slice on each tortilla. Spoon filling off center on each tortilla. Top with salsa and sour cream. Fold sides and ends over filling and roll up. Yield: 2 servings.
Posted by Picasa

Tuesday, September 7, 2010

South Carolina BBQ Pork Sliders

OK... here it is! My NEW FAVORITE way to slow cook pork. I have made it twice since I discovered it. Dare I say that I like it as much as, if not more than my "Famous" Cafe Rio Pork... DARE I??? Indeed, I do. (Which is saying A LOT because I STINKIN' LOVE the Cafe Rio Pork!) But much of my love for this new recipe is a result of the SHEER SIMPLICITY involved in it's preparation. SUPER EASY and SUPER SENSATIONAL! Love this recipe, and dare I say that you will too??? Indeed, I do.

Lyd's Tips: Get a good size inexpensive pork roast and you can either freeze some of the left-overs in a zip-lock bag to heat up on a busy night, or it makes a great meal for a friend or neighbor. Super easy with some fresh rolls. I whipped up a batch of Afton's Easy Dinner Rolls and they went great together. (I also thought melted cheese would be happy on these sliders, in case you were wondering.) We have also used it in kind of a "nacho" form with cheese and chips and that was really good too.

South Carolina BBQ Pork Sliders
By Woman's Day Kitchen from Woman's Day; June 2, 2009 June 2, 2009
Active Time: 15 minutes
Total Time: 8 hours

1 slow-cooker liner (Slick clean-up, but not nessessary.)
1/4 cup packed brown sugar
2 Tbsp each paprika and dried minced onion
1 1/2 tsp salt-free chili powder
1 1/2 tsp salt
1/2 tsp garlic powder
1/2 tsp allspice (optional)
4 lb bone-in pork shoulder roast
3/4 cup apple cider vinegar
1/2 cup sliced scallions
24 small dinner rolls, split
Accompaniments: hot pepper sauce, coleslaw

1. Line a 4-qt or larger slow-cooker with liner. Mix 1 Tbsp of the brown sugar, the paprika, minced onion, chili powder, salt, garlic powder and allspice. Sprinkle 1 Tbsp into bottom of slow-cooker. Rub remaining mixture over pork. Add vinegar and remaining brown sugar to slow-cooker; stir to mix. Add pork.
2. Cover and cook on low 8 to 10 hours until pork is fork-tender. Remove pork to cutting board and pull into shreds. Return to slow-cooker; add scallions and toss to coat.
3. Put about 1/4 cup onto each bun bottom. Top with bun tops.
Posted by Picasa

Sunday, September 5, 2010

Perfect Pear Crisp


I saw a picture of this pear Crisp and it made my mouth water, so I had to make it. I know it probably wasn't the same, but I didn't have any fresh pears, so I used canned pears (2 or 3 large cans). It was EASY and it cooked up faster- but pears are in season so take advantage! I really liked the nuts on top. I think the topping needed oats though. All-in-all, a delicious dessert dish! (I even made real whip cream! Mmmmm!)

Perfect Pear Crisp (kraftrecipes.com)
1 Lemon
1/2 cup Granulated sugar, divided
1/3 cup plus 2 Tbsp. flour, divided
1 tsp. Ground cinnamon, divided
8 fresh pears (about 2-1/2 lb.), peeled, cut into 1-inch chunks
1/4 cup packed brown sugar
1/3 cup cold butter, cut up
1/2 cup PLANTERS Sliced Almonds
1 cup thawed COOL WHIP Whipped Topping

HEAT oven to 375ºF.
GRATE enough lemon peel to measure 1/2 tsp. zest. Squeeze enough juice to measure 1-1/2 Tbsp. Mix 1/4 cup granulated sugar, 2 Tbsp. flour and 1/2 tsp. cinnamon in large bowl. Add pears, lemon zest and juice; toss until pears are evenly coated. Spoon into 8-inch square baking dish.
MIX brown sugar and remaining flour, granulated sugar and cinnamon in medium bowl. Cut in butter with pastry blender or 2 knives until mixture forms coarse crumbs. Stir in nuts; sprinkle over pears.
BAKE 40 to 45 min. or until topping is golden brown and pears are hot and bubbly. Serve topped with COOL WHIP.

Kraft Kitchens Tips

Bake dessert in 9-inch square baking dish or shallow 2-qt. casserole instead of the 8-inch square baking dish.

What To Look For When Purchasing Pears
Look for pears with a fragrant aroma and coloring characteristic of their variety. Skins should be free from cuts and bruises. A ripe pear is one that feels slightly firm, but gives a bit to gentle pressure at the stem end.
Posted by Picasa

Thursday, September 2, 2010

Chicken Milanese

OH SO GOOD! I saw Chef Anne Burrell making this on TV and I just knew I needed to give it a try. It is so exciting to me to serve a nice restaurant style meal that I made in my own home. This recipe reminded me a lot of the Tonkatsu (pork). It is a lot the same process, but I thought it was smart to season the meat ahead of time, and include Parmesan in the panko. It was so tender and delicious! You've gotta try this one!

Chicken Milanese (By Chef Anne Burrell)
1 cup all-purpose flour
2 eggs, beaten with 1 tablespoon of water
1 1/2 cups panko bread crumbs
1/2 cup grated Parmigiano-Reggiano
4 small organic chicken breasts, butterflied and lightly pounded to 1/4-inch thick
Kosher salt
Extra-virgin olive oil, for frying
1 tablespoon butter

Set up a standard breading procedure in 3 wide deep plates. Fill 1 with flour, 1 with the beaten eggs, and 1 with the panko and grated Parmigiano. Season the chicken breasts with salt. Using one hand for dry things and 1 hand for wet things, take each piece of chicken through the breading procedure: dredge lightly in the flour, then the egg wash and then through the bread crumbs. Lay the breaded chicken on a sheet tray and refrigerate for at least 1 hour.

Pour olive oil into a large saute pan until it reaches a thickness of about a half an inch - better a little more rather than a little less. Bring to a medium-high heat and add butter. Test the oil by flicking flour or bread crumbs into the oil. If it doesn't sizzle-WAIT! When the oil is hot, test it again by dipping the edge of a piece of chicken into the oil, the oil should gently sizzle. Cook the chicken in the oil in batches on both sides until it is a lovely golden brown color and is crispy, about 4 to 5 minutes. Do not crowd the pan or the chicken will become very greasy and soggy. When the chicken comes out of the oil lay it on paper towels to drain off the excess oil and sprinkle with salt. You can keep the chicken in a low oven to keep it warm while the rest of the chicken is cooking.
Posted by Picasa

Tuesday, August 31, 2010

ABC Melts

MY BABY GIRL IS STARTING KINDERGARTEN TOMORROW! I can't believe she is that old! She is so excited and ready, and today we had a practice wake up call and drill. :) Here is a healthy, quick and easy little snack/lunch/breakfast in honor of her big. I feel old! I remember shopping for school supplies with my mom- it feels funny to be on this end. I think I just need to sit down and have an "ABC Melt" to break me in. :)

ABC Melts
(Simple and Delicious)
2 English muffins, split and toasted
2 teaspoons prepared mustard
4 slices Canadian bacon (I just used ham.)
1 medium apple, thinly sliced
4 slices Swiss cheese (I used mozzarella for lack of Swiss.)

Place muffin halves, cut side up, on an ungreased baking sheet. Spread with mustard; layer with Canadian bacon, apple slices and cheese. Bake at 350° for 5-6 minutes or until cheese is melted. Yield: 2 servings.
Posted by Picasa

Saturday, August 28, 2010

Woman! Bake Me A Pie... RIIIIGHT NOW!


THE FACTS ARE THESE... this pie is too good to miss! Have you seen "Pushing Daisies"? It is a cute, fanciful TV show that aired a while back. Don't plan on closure at the end of it all- total cliff hanger, but even still- I really enjoyed the ride! It is just clean and clever, out of the ordinary. The main character is Ned, the pie maker and owner of the "The Pie Hole." My husband and I watched the whole first season just dying for at least one bite of his bright, beautiful pies... but alas... I had to make my own, and I did some hunting for what I think turned out to be some GREAT recipes! (At least the best I have ever made- the crust turned out beautifully and I have never made a good crust.) My husband had a friend that said that his only requirement for his "wife-to-be" was that he could just say, "Woman! Bake Me A Pie... RIIIIGHT NOW!" and she would do so... immediately. :) Every once in a while, Doug will say it to me... and every once in a while, I indulge him.
I also wanted to but a plug in for this little beauty. My sister-in-law Amy also mentioned it- and I can't for the life of me remember who told us about it, so I am sending a "THANK YOU" into the abyss! It is SO HANDY! It works wonderfully well and you don't have to worry about keeping fresh buttermilk and always having it on hand. Great for pancakes or baking or anything. I am fully converted!

Buttermilk Pie Crust

By Joy the Baker (click on the link for her great step by step visual tutorial.)

makes a double crusted 9-inch pie crust

Print this Recipe!

2 sticks (8 ounces) cold unsalted butter

2 1/2 (12 ounces) cups all purpose flour

1 Tablespoon sugar

1 teaspoon salt

1/2 cup (5 to 6 ounces) buttermilk

1. Cut the butter into 1-inch pieces and place in the freezer to chill for 15 minutes. Measure out the buttermilk and store in the refrigerator to keep it cold (you could even put it in the freezer for a few minutes too).

2. Sift together the flour, sugar and salt in a large bowl. Take the cold butter from the freezer and toss it with the flour mixture.

3. Dump the cold butter cubes and flour mixture onto a large work area for rolling. With a rolling pin, roll the mixture, flattening the butter cubes with the flour into long, thin, floured butter sheets. Work quickly to ensure that the butter stays cold. Below is what the rolled butter and flour look like after I’

ve gathered them together on the work surface a bit.

4. Place the flour and flattened butter back in the large bowl and chill for 10 minutes. When the butter is cold, remove the bowl from the refrigerator, make a small well in the center of the flour and butter mixture. Add the cold buttermilk to the bowl all at once. Begin to bring the dough together with one hand ( keep the other hand free to answer the phone). Moisten all of the flour with the milk, using your hand to break up large clumps of milk and flour. The dough will be rather shaggy, but you can add another tablespoon of buttermilk, if you see that all your flour isn’t moistened. Form the dough into two disks. The disks will be rough, and hard to shape together, but once they rest in the fridge for an hour, they’

ll be easier to roll out.

5. Chill the dough for at least an hour in the refrigerator. At this point, the dough will keep in the fridge for up to three days, or in the freezer for up to three weeks. For freezing, roll the dough out into sheets and wrap them in plastic film.

6. Roll out the top crust large enough to cut a 12-inch circle.

Transfer the pie filling mixture to the pie shell. Moisten the border of the bottom crust by brushing it lightly with water and place the top crust over the filling. Trim the overhang of the top crust so that there is only 1/2-inch of overhand. Tuck the overhand under the bottom crust boarder and press down all around to seal it. Crimp the border using a fork or your fingers and make about 5 evenly spaced 2-inch slashes starting about 1 inch from the center of the pie and radiating toward the edge. Cover the pie loosely with plastic wrap and refrigerate it for 1 hour before baking. This will chill and relax the pastry, preventing shrinking.

Posted by Picasa

Fresh Blackberry Pie

Look at those beautiful blackberries!!! (The fresh lemon zest played a big part in the heavenly flavor!) Our little family went blackberry picking recently- we came home quite scraped and slivered, but what a prize! After these beautiful pies, I decided it was well worth the battle. :) You have to use the amazing Buttermilk Pie Crust recipe to go with it- SO GOOD! I will eat this pie any day... and grow very fat and happy!

Blueberry Pie (Or Blackberry in this case :)

From Annie's Eats


Ingredients:

2 rolled-out rounds basic pie dough

4 cups blueberries

1 tbsp. fresh lemon juice

¾ cup sugar

3 tbsp. cornstarch

½ tsp. finely grated lemon zest

¼ tsp. salt

¼ tsp. cinnamon

1 tbsp. cold unsalted butter, cut into pieces

1 egg

1 tbsp. water


Directions:

Line the bottom of a 9-inch pie pan with one of the rolled-out dough rounds. Set pan aside in a cool place until ready to fill.


To make the filling, place the blueberries in a large bowl, sprinkle with the lemon juice and toss to coat evenly. In a small bowl, stir together the sugar, cornstarch, lemon zest, salt and cinnamon. Sprinkle the sugar mixture over the berries and toss to distribute evenly. Immediately transfer to the dough-lined pan. Dot with butter pieces. Place the remaining dough round on top of the pie and trim the excess from the bottom and top rounds. Crimp the dough rounds together to seal the edges. Be sure to cut vents in the top crust to allow steam to escape during baking.


Refrigerate the pie until the dough is firm, 20-30 minutes. Position a rack in the lower third of the oven and preheat to 375°. In a small bowl beat the egg and water with a fork to make an egg wash. Brush onto the top crust just before baking.


Bake the pie until the crust is golden and the filling is thick and bubbling, 50-60 minutes. Transfer to a wire rack and let cool completely to set, 1 to 2 hours. Serve at room temperature or rewarm in a 350° oven for 10 to 15 minutes just before serving.


Note: If fresh blueberries are unavailable, use frozen blueberries (without thawing) and increase the baking time by 10-15 minutes.

Posted by Picasa

Thursday, August 26, 2010

Orange Chicken... that wasn't actually orange :)


I am always hunting for crockpot recipes- I love how easy and delicious they are. I came across this one and I thought I would give it a try... HOWEVER I didn't have orange marmalade, so I had to use the blackberry jam I had on hand.... giving it a lack of "orange," but still a good flavor. If I were to try it out again though, I think I would use this recipe. It looks a bit more promising. This was still tasty though.

Orange Chicken in the Crockpot
  • 3 pounds chicken parts (leg quarters, bone-in breast halves, etc.), skin removed
  • 1/2 cup orange marmalade
  • 1/2 cup orange juice
  • 1/4 cup chicken broth
  • 2 tablespoons cornstarch
  • 2 tablespoons brown sugar, firmly packed
  • 2 tablespoon lemon juice
  • 1 teaspoon salt
Rinse chicken and pat dry; place in crockpot. Combine remaining ingredients in a bowl or 2-cup measure and pour over chicken. Cover and cook on low for 6 to 8 hours. (Mine was done in about 5-6.) Serve with hot cooked rice or noodles.
Posted by Picasa

Doug's Steak Marinade

Doug fried us up some yummy steaks that he had marinating. They were really good and this was what he used to marinate them in.

Doug's Steak Marinade
1/2 cup canola oil
1/4 cup lemon/lime juice
1-2 T soy sauce
1-2 T Worcestershire Sauce
1-2 T Vinegar
1 T minced garlic
1/2 an onion, chopped
1 tsp basil
1 tsp oregano

Mix all ingredients well and pour into zip lock bag. Place 4 steaks in the bag and toss to coat. Let it marinate in the refrigerator for 1 hour or over night. Grill or pan-fry and serve. (If you do it in a pan, pour in the marinade and cook them in the juices to add flavor.)


Posted by Picasa

Basic Coleslaw

Here's a basic coleslaw with a tangy mayonnaise dressing, and it's a great choice for summer meals. Serve this coleslaw with barbecue or sandwiches. I found that this recipe got better with time. I liked it a lot better after it sat in the fridge for a day or two- the juices run together in a good way and the cabbage softens ever so slightly to make it PERFECT. This was really good, but it didn't top my mom's coleslaw, which I have never quite been able to make like her, so I am forever making failed attempts. :)

Basic Coleslaw (About.com)
6 cups shredded cabbage
1 carrot, shredded
2/3 cup mayonnaise
2 tablespoons vinegar (I just did 1 T and I would hesitate to add more then that.)
2 tablespoons vegetable oil
2 1/2 tablespoons sugar, or to taste
1/2 teaspoon celery salt
1/4 teaspoon salt, or to taste
Preparation:
Toss cabbage in a large bowl with the carrots. In a bowl, whisk together the remaining ingredients. Pour the mixture over the cabbage and carrots and toss to coat thoroughly. Refrigerate until serving time.Serves 6.
Posted by Picasa

Sunday, August 22, 2010

BIONIC Turkey Bean Burgers


A "Bean Burger" probably doesn't get you that excited (unless you are like me and you like beans altogether too much... so much so that your husband bans them from the dinner table- only can I serve/eat them on rare occasions-- I will not expound on why.) HOWEVER... once you take a bite of this little number, you will indeed get excited! I got this idea from Rachel Ray's Strech a Buck Turkey and Bean Burrito Burgers, I used most of the same ingredients, but I added a few things that I think made the burgers hold together a little better and taste amazing! They are similar to my "Better Burger", but it just kicks it up a notch... or two... or three. :) I didn't used rice, but I did used bread crumbs and an egg. I also grilled them up on a little George Foreman Grill- which, if you don't have, I would TOTALLY recommend investing in. I love little George! He and I have so much fun making burgers and grilling chicken together. (And I too was doubtful at first, but I am fully converted!) These burgers just made me happy to bite into- I hope it does the same for you!

BIONIC Turkey Bean Burgers (Adapted by Lyd)
I made about 6-8 burgers.
  • 1 1/2 pound ground turkey
  • 1 (15-ounce) can pinto beans, rinsed and drained
  • Palmful chili powder
  • 1 1/2 teaspoons, half a palmful, cumin
  • 1 tsp oregano
  • 1 1/2 teaspoons coriander, half a palmful
  • 1 tablespoon grill seasoning, (recommended: Montreal Seasoning by McCormick)
  • 1 can of black olives, drained and finely chopped
  • 1/2 package taco seasoning
  • 2 tablespoons seasoned bread crumbs
  • 1 egg
  • 1/4 cup fresh cilantro, finely chopped
  • Hamburger Buns
  • Tomatoes
  • Lettuce
  • Avocado (if you have them)
Combine meat and beans with spices and grill seasoning (everything but the last four ingredients). Form patties from the meat and bean mixture. Cook patties 7 to 8 minutes on each side. (Or throw them on the George Foreman Grill for about 4-5 minutes.) Put the burgers in a bun with the works and take a BIG BITE!
Posted by Picasa

My ALL-TIME Favorite Zucchini Casserole

I'll have you know that I carried these zucchini's on my lap for a 10 hour drive- that is how much I love zucchini. They were just coming on in my parents garden and I had to snag a couple before I left. So what I am saying is that the VERY uncomfortable car ride was made worth it by this....

I promised zucchini recipes and here they are! I tried this one out when we were first married almost 7 years ago, and we both loved it. It is just the perfect casserole! Then I lost it in the abyss... but I've recently resurrected it, and it is BETTER THEN EVER! I've tried several zucchini casseroles, but they just haven't topped this one. It's creamy, rich, healthy, and DELICIOUS all in one big casserole dish. Feeds a big crew, and it's an EXCELLENT way to sneak in the zucchini. (My mom gave me this one a while back- she got it from a Zucchini Relief Society activity.) It even makes great left-overs! :)

Zucchini Casserole
1 lb beef (or turkey burger)
1 large onion, chopped
salt and pepper to taste
2 cup (or more) finely chopped zucchini
1-2 cups shredded carrots (about 3 carrots)
1 can cream of chicken
1/2 sour cream1 box stove top stuffing mix

In a large pan, brown burger. (Drain if it has a lot of fat- that is why I prefer turkey burger though- a lot less fat.) Add onion, salt and pepper, zucchini, and carrots. Cook on medium-high heat stirring frequently. When veggies are tender, stir in sour cream and cream of chicken. Transfer mixture into a casserole dish. Meanwhile, prepare stove top dressing according to package directions (I usually do it in the microwave because it is faster.) Spread prepared stuffing over the top of casserole. Bake at 350 for 20-30 minutes or until bubbly.
Posted by Picasa